Cataloging ML Matched data
PART A: Create Glue Crawler for ML Matched Auto and Property data.
1. Navigate to the AWS Glue Console

2. On the AWS Glue menu, select Crawlers.

3. Click Add Crawler.
4. Enter C360-workshop-glue-crawler-ml-matched as the crawler name.
5. Optionally, enter the description. This should also be descriptive and easily recognized and Click Next.
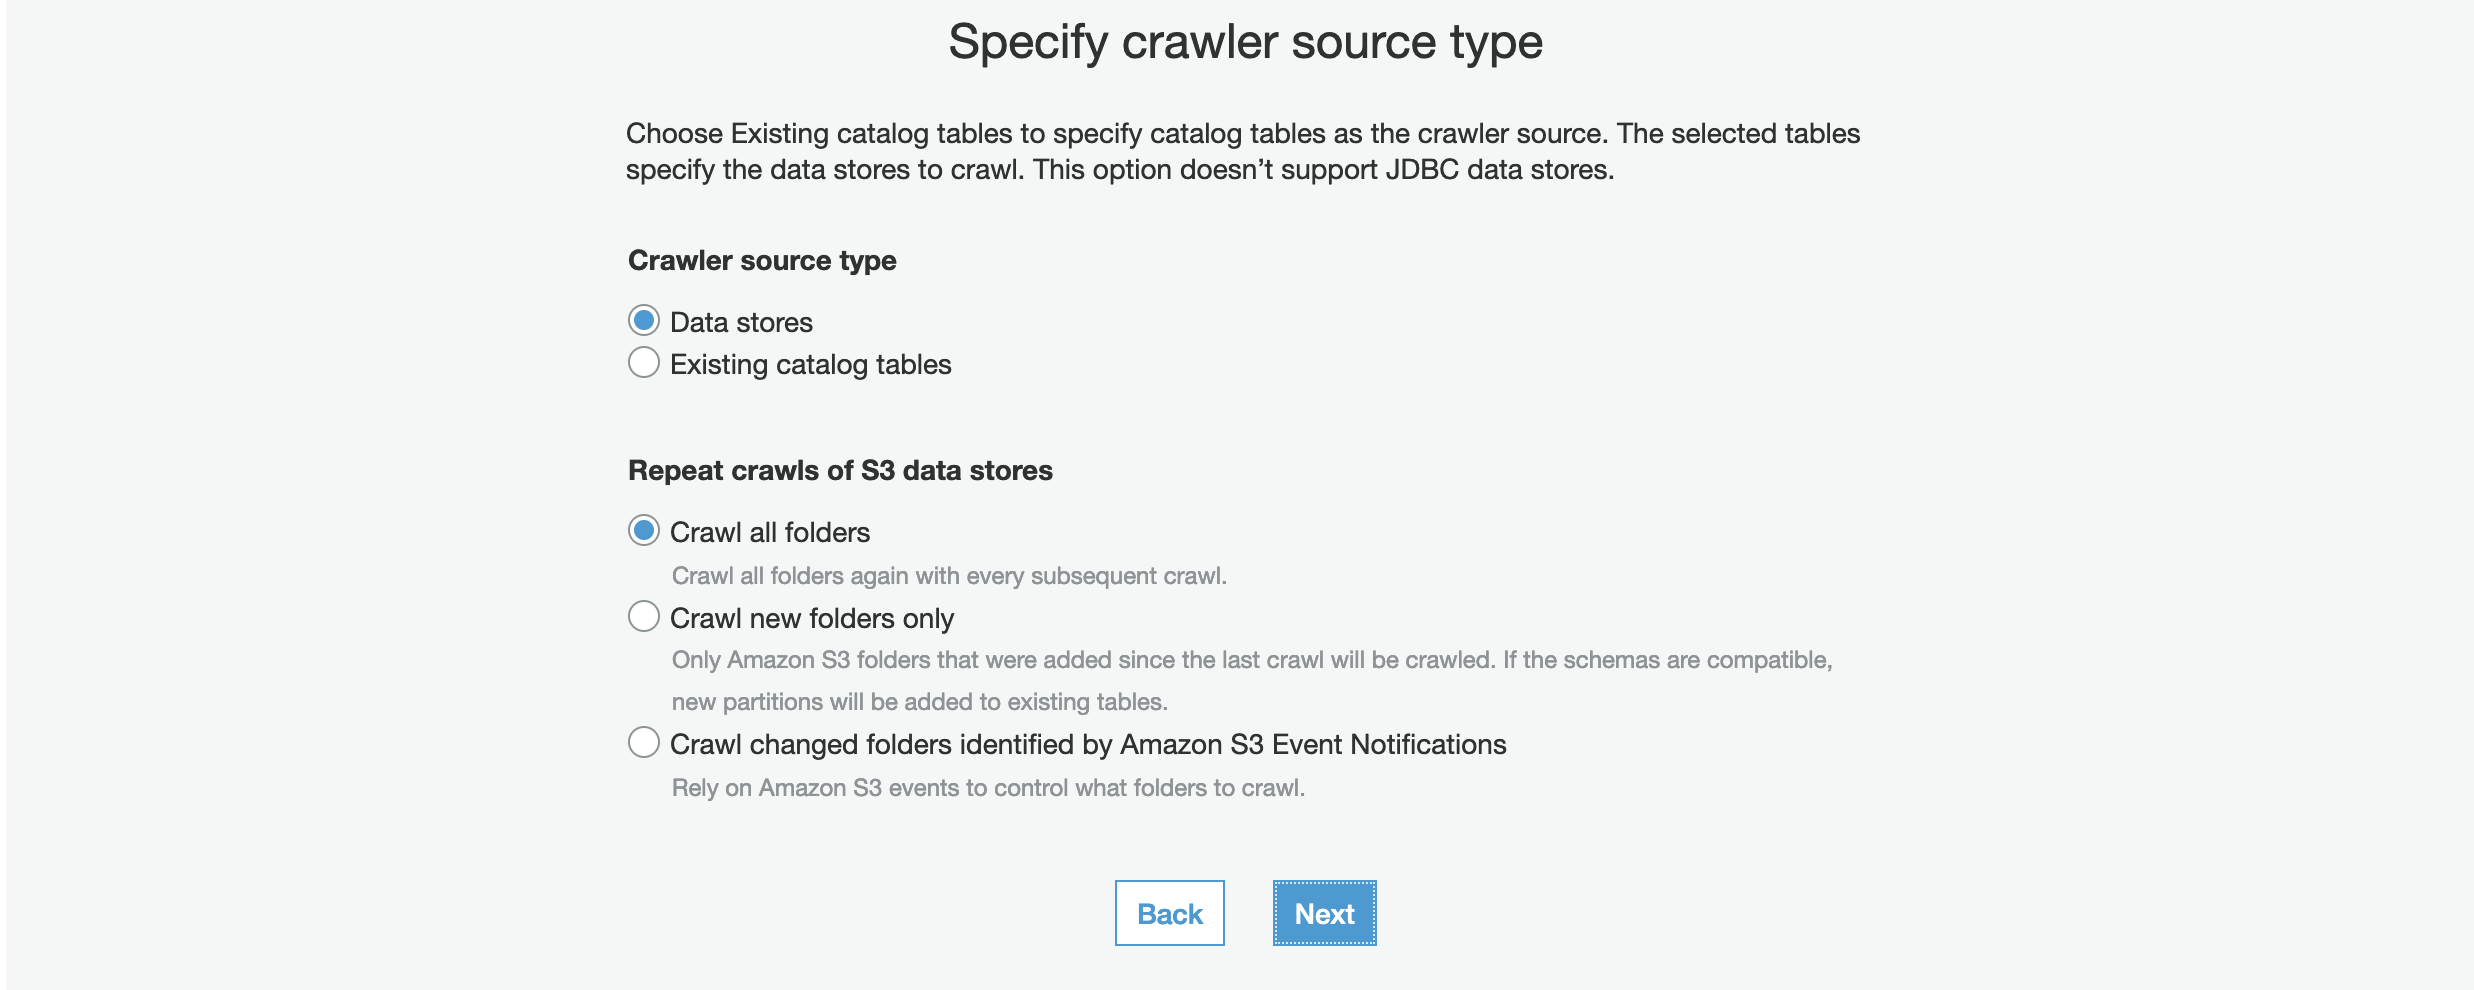
6. Choose Data stores, Crawl all folders and Click Next

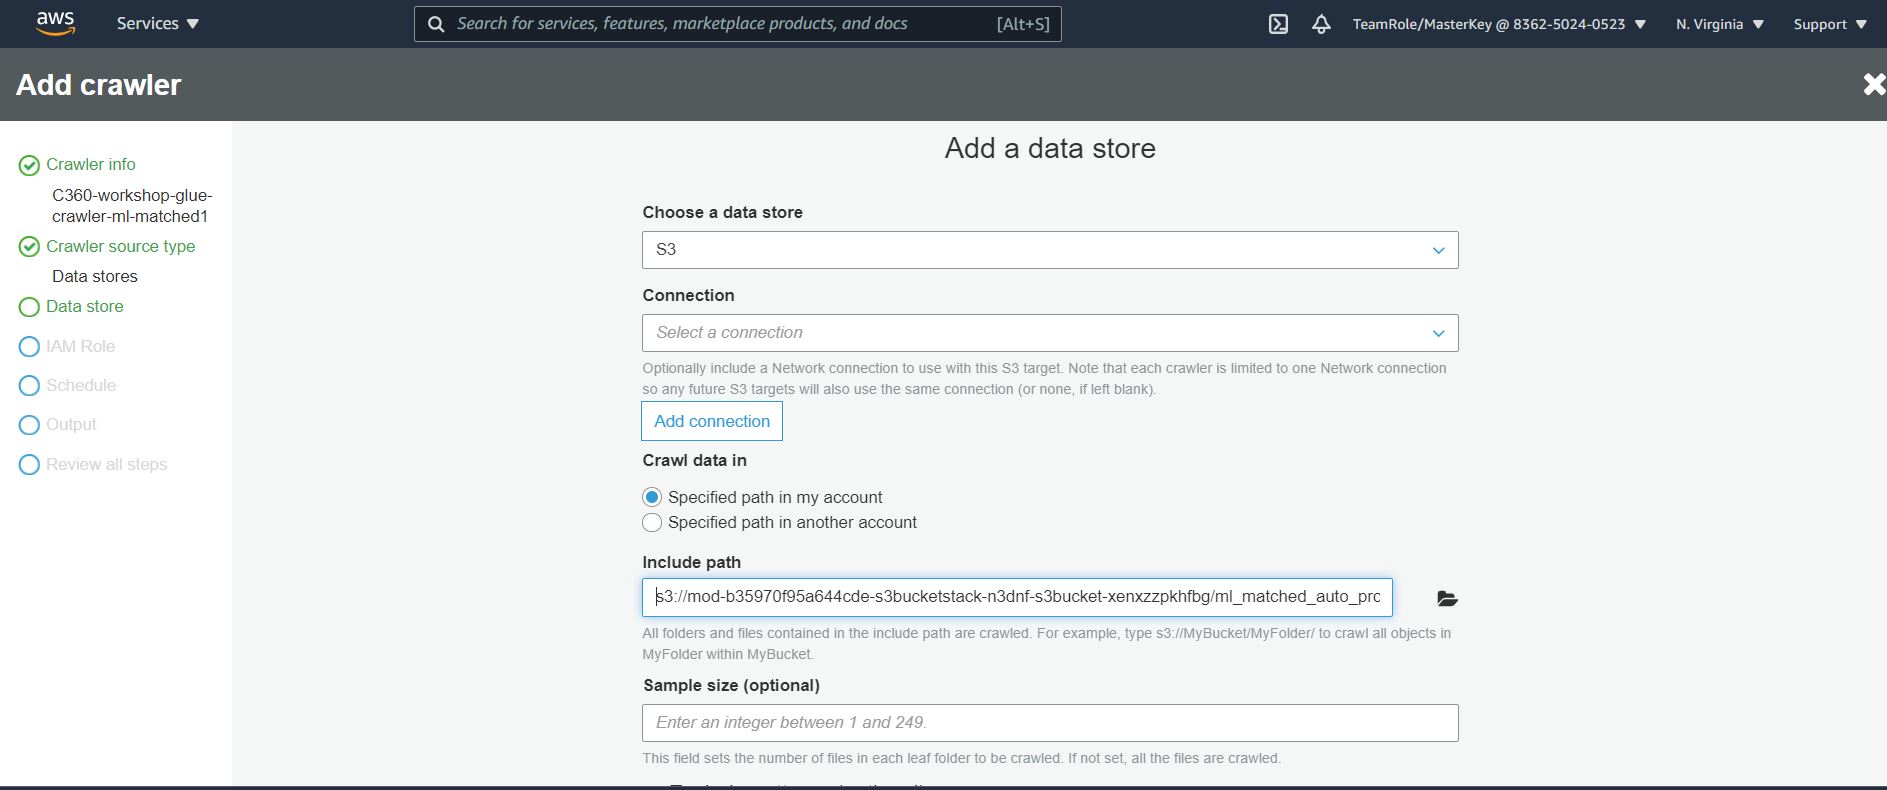
7. On the Add a data store page, make the following selections:
- For Choose a data store, click the drop-down box and select S3.
- For Crawl data in, select Specified path in my account.
- For Include path, browse to the target folder stored CSV files, e.g., s3://mod-xxxx-s3bucketstack-xxx-xxx-s3bucket-xxx/ml_matched_auto_property/
8. Click Next.
9. On the Add another data store page, select No. and Click Next.

10. On the Choose an IAM role page, make the following selections:
Select Choose an existing IAM role. For IAM role, Glue Role pre-created for you. For example GlueServiceRoleLab
11. Click Next.

12. On the Create a schedule for this crawler page, for Frequency, select Run on demand and Click Next.

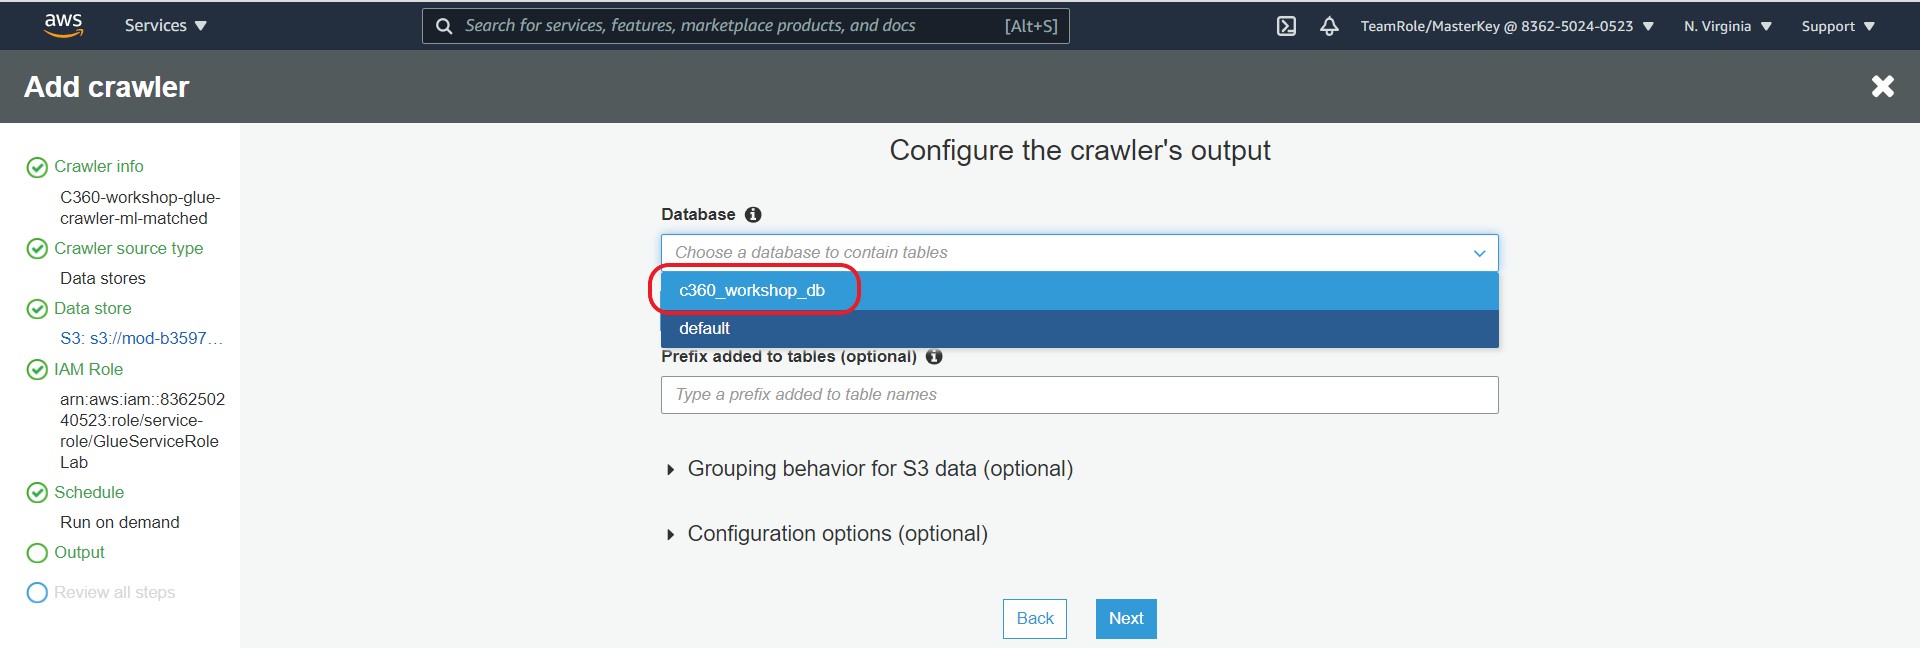
13. On the Configure the crawler’s output page, click on Database drop down and select c360_workshop_db.

14. Click Next
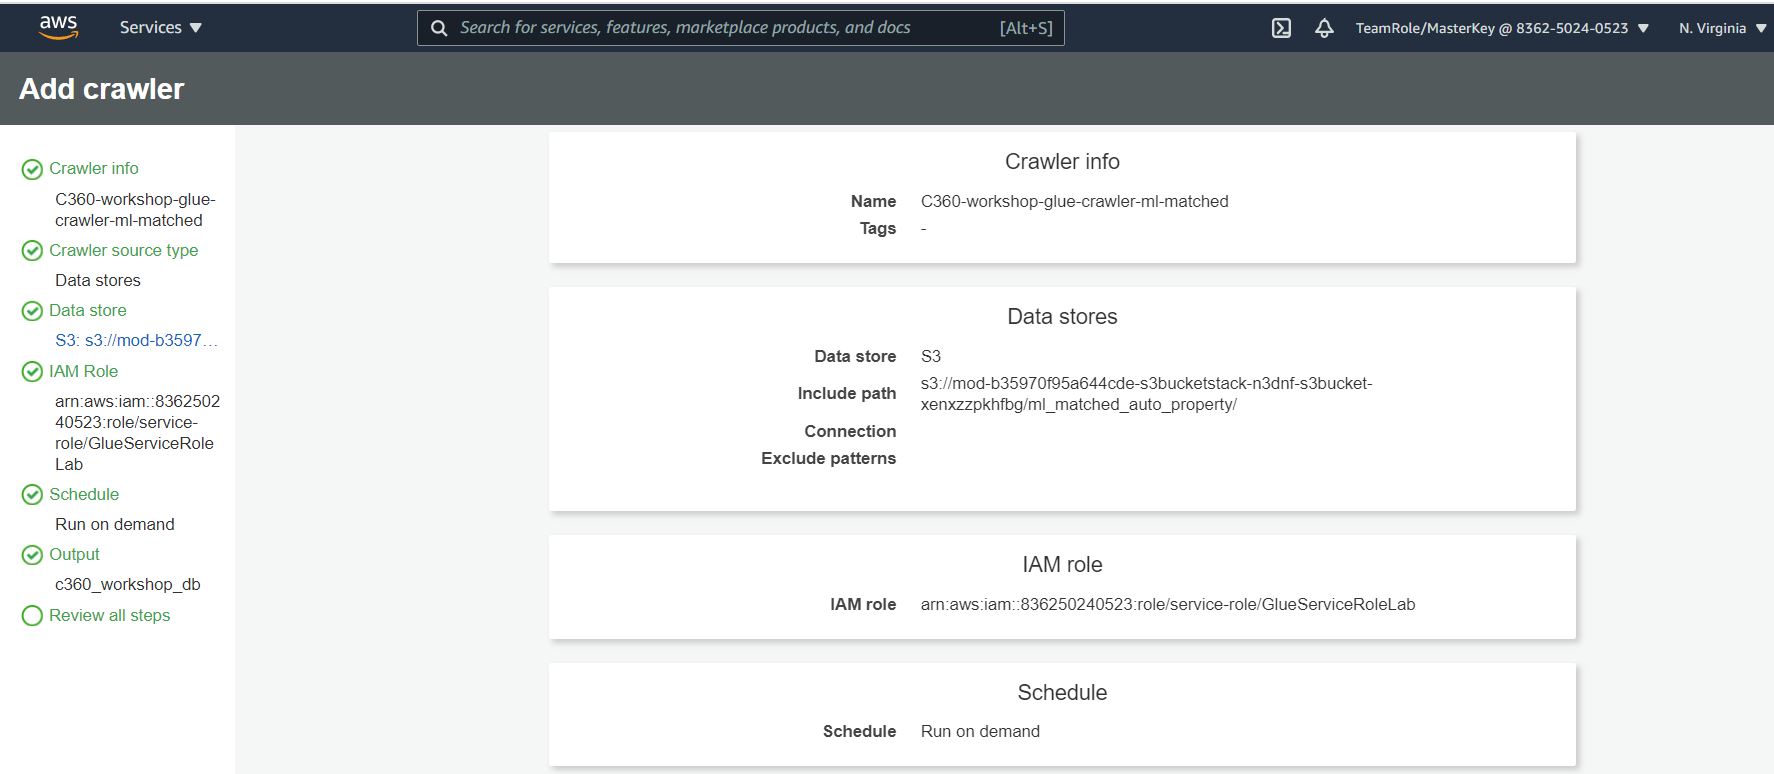
15. Review the summary page noting the Include path and Database output and Click Finish. The crawler is now ready to run.
16. Tick the crawler name, click Run Crawler button.

Crawler will change status from starting to stopping, wait until crawler comes back to ready state (the process will take a few minutes), you can see that it has created 1 table.

17. In the AWS Glue navigation pane, click Databases → Tables. You can also click the C360_workshop_db database to browse the tables.


