Create and Run ETL Job with ML Transform
Prerequisites : This lab requires Prerequisites and Lab 1 to be completed before you can continue.
After you create a FindMatches transform and verify that it has learned to identify matching records in your data, you are ready to identify matches to perform deduplication over your complete dataset.
1. In the AWS Glue Console left navigation pane, choose Jobs, then click on “Add Jobs”
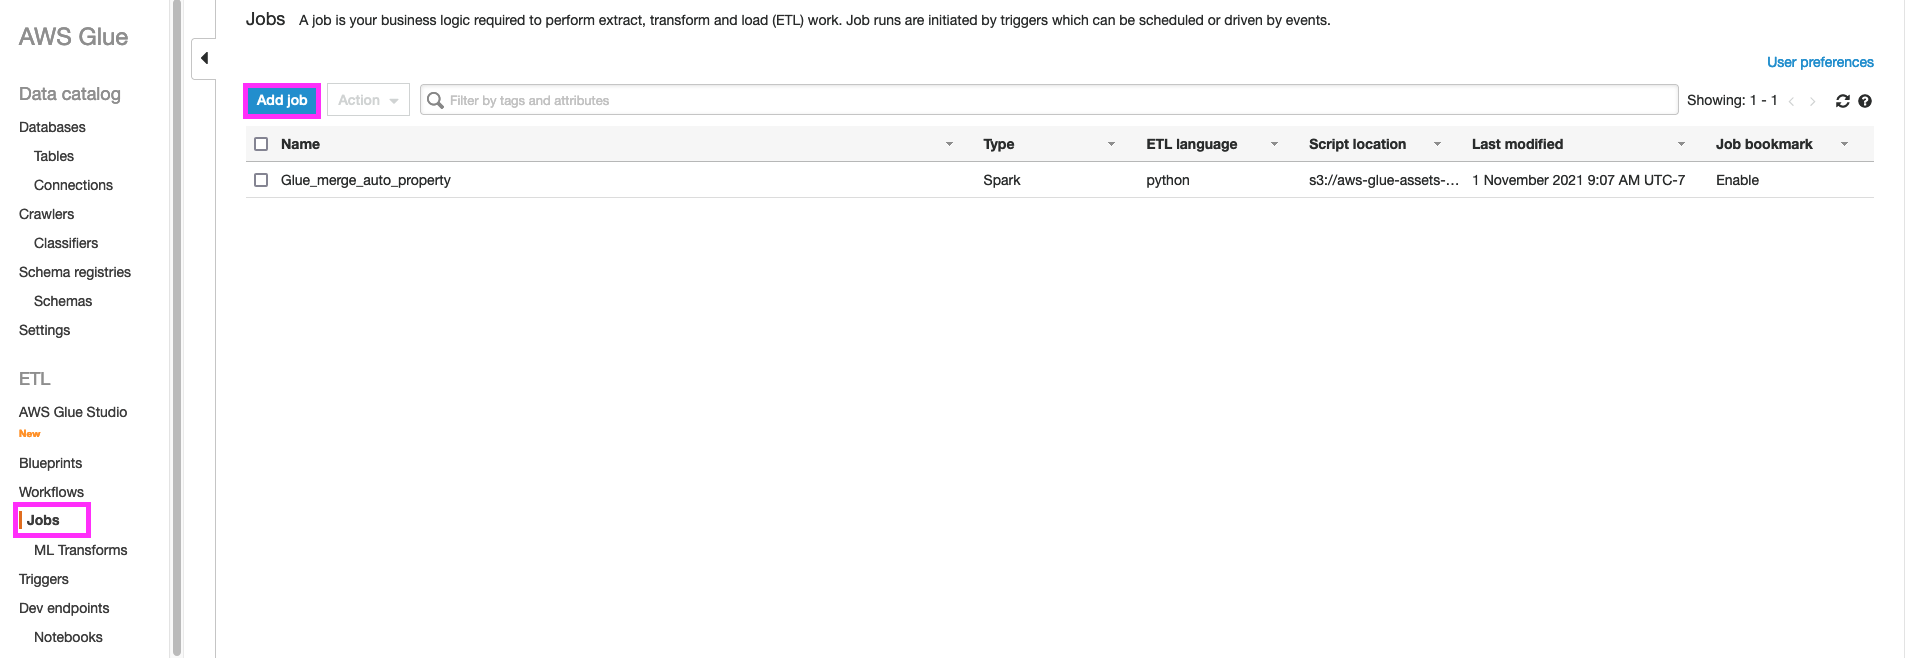
2. Under Configure the job properties, specify name as c360-ml-dedup-job
3. Select IAM Role containing tag GlueServiceRole
4. Select Type as Spark
5. Glue version as Spark2.4,Python 3(Glue version 2.0)
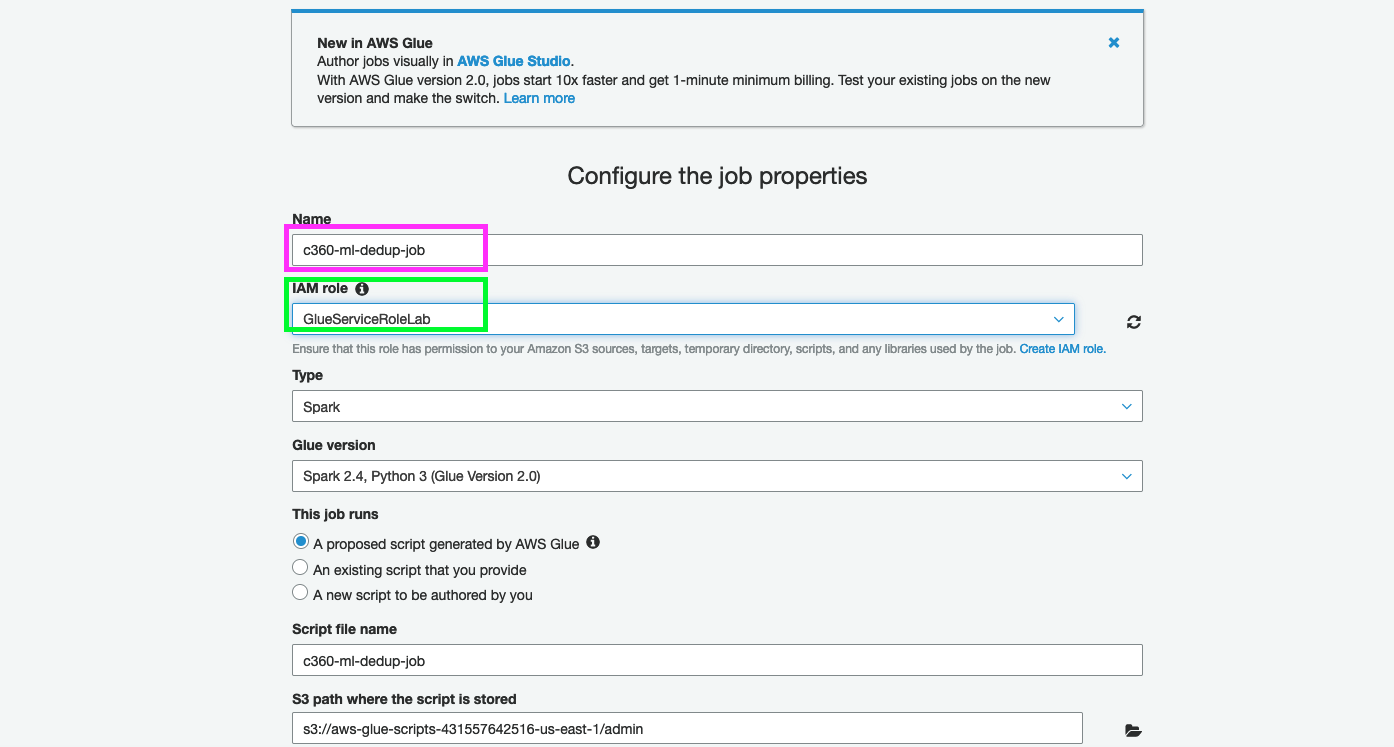
6. Keep defaults for other values and click Next
7. Select merged_auto_property as a data source
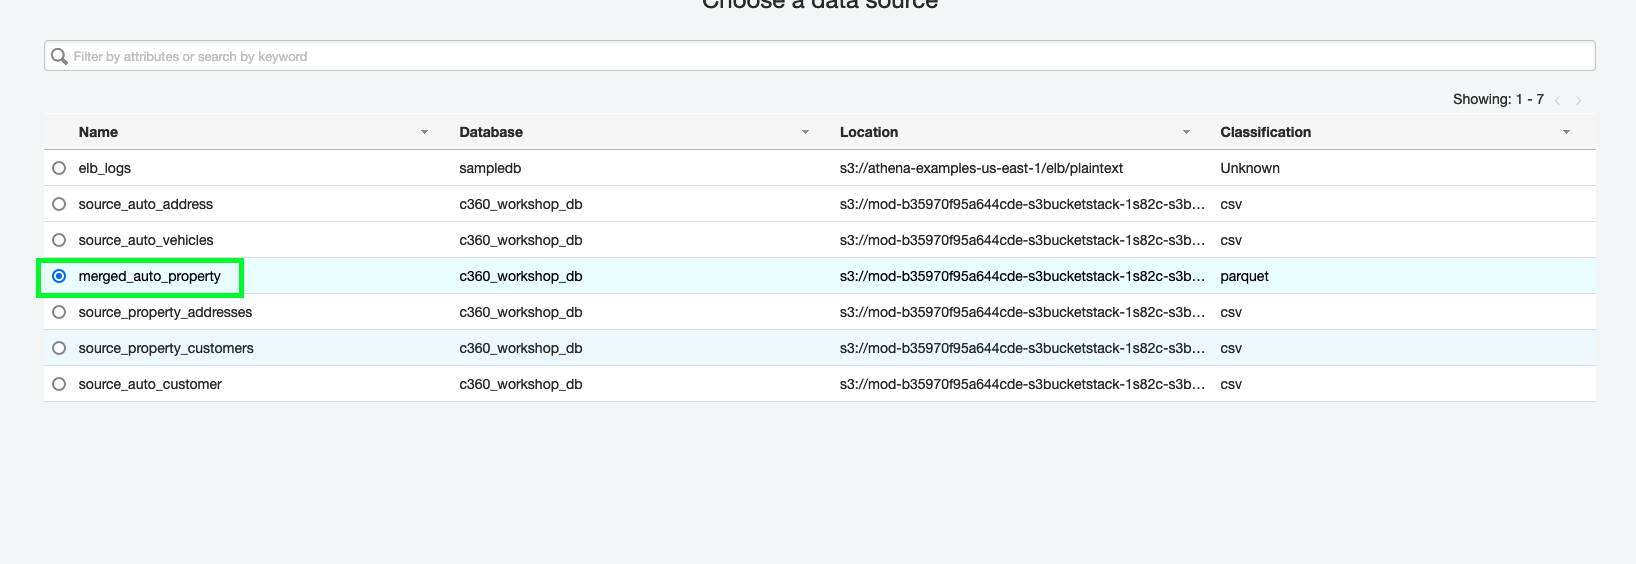
8. Click Next - On the next page, select Find Matching Records
9. Select Worker Type as G.2X
10. Select Number of Workers as 20
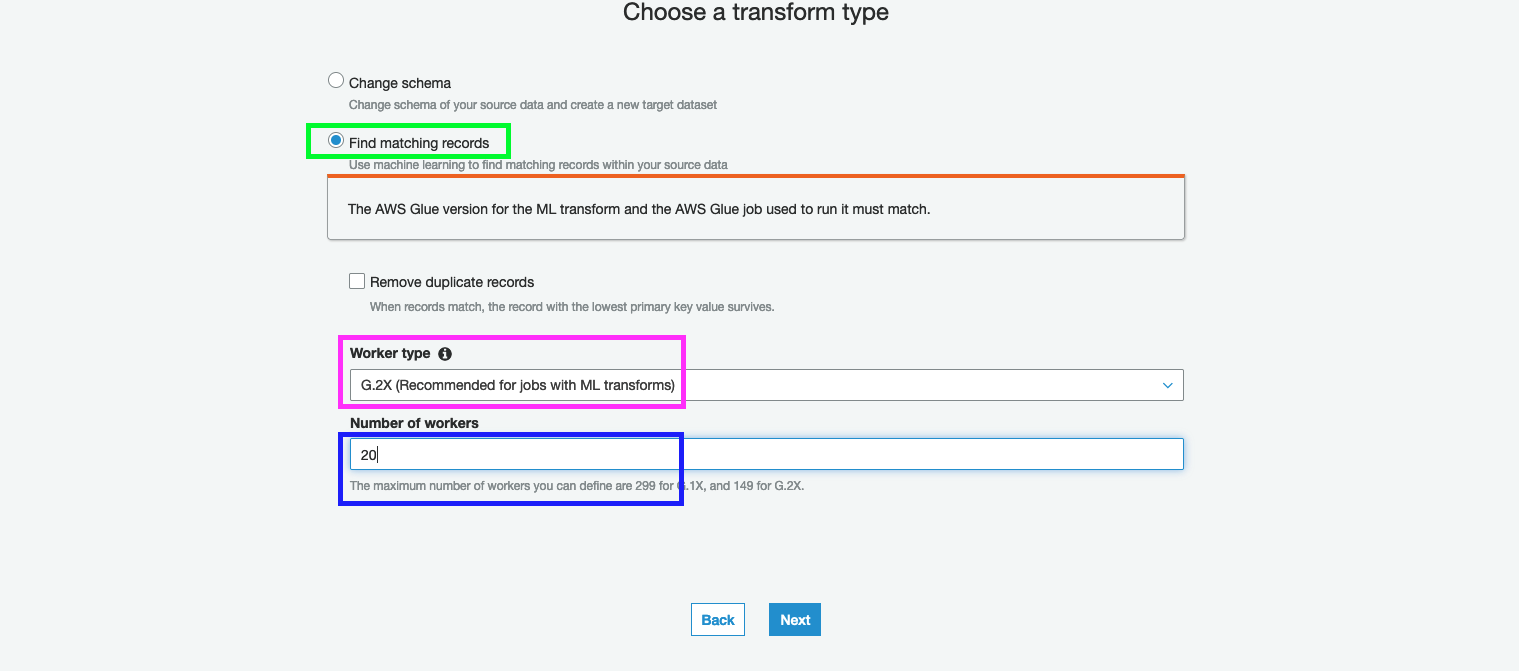
11. Click Next
12. On the next page, select c360-ml-transform and click Next
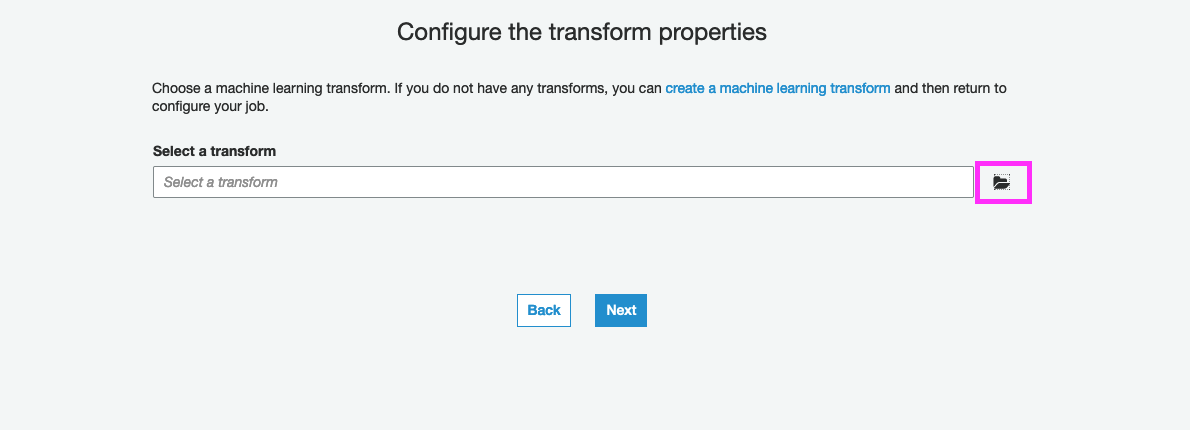
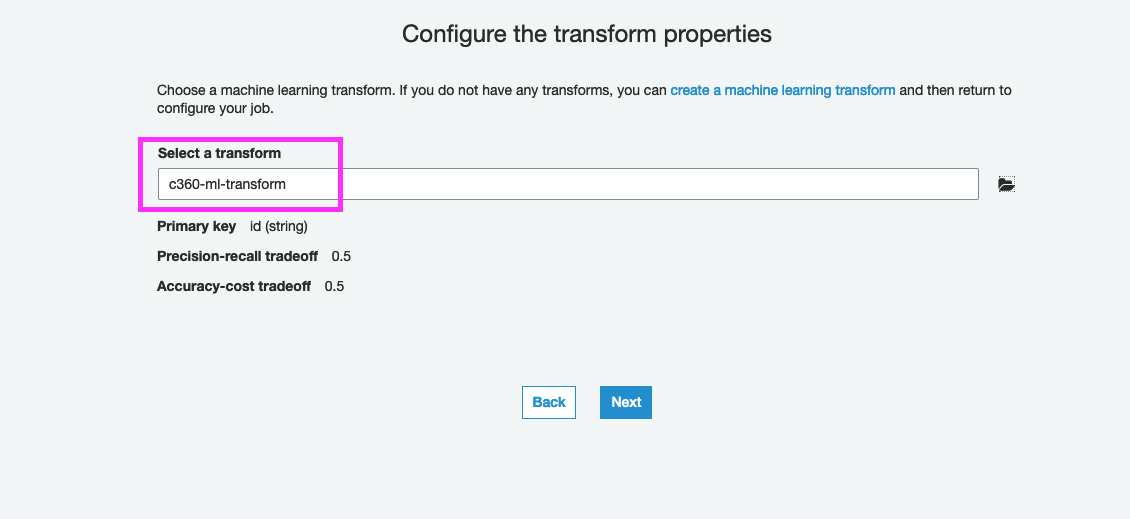
13. On the next page, select Create tables in your data target
14. Choose Amazon S3 as a data stored
15. Select Format as CSV
16. Specify the Target path to ml_matched_auto_property prefix - for example: s3://mod-xxxx-s3bucketstack-xxx-xxx-s3bucket-xxx/ml_matched_auto_property/
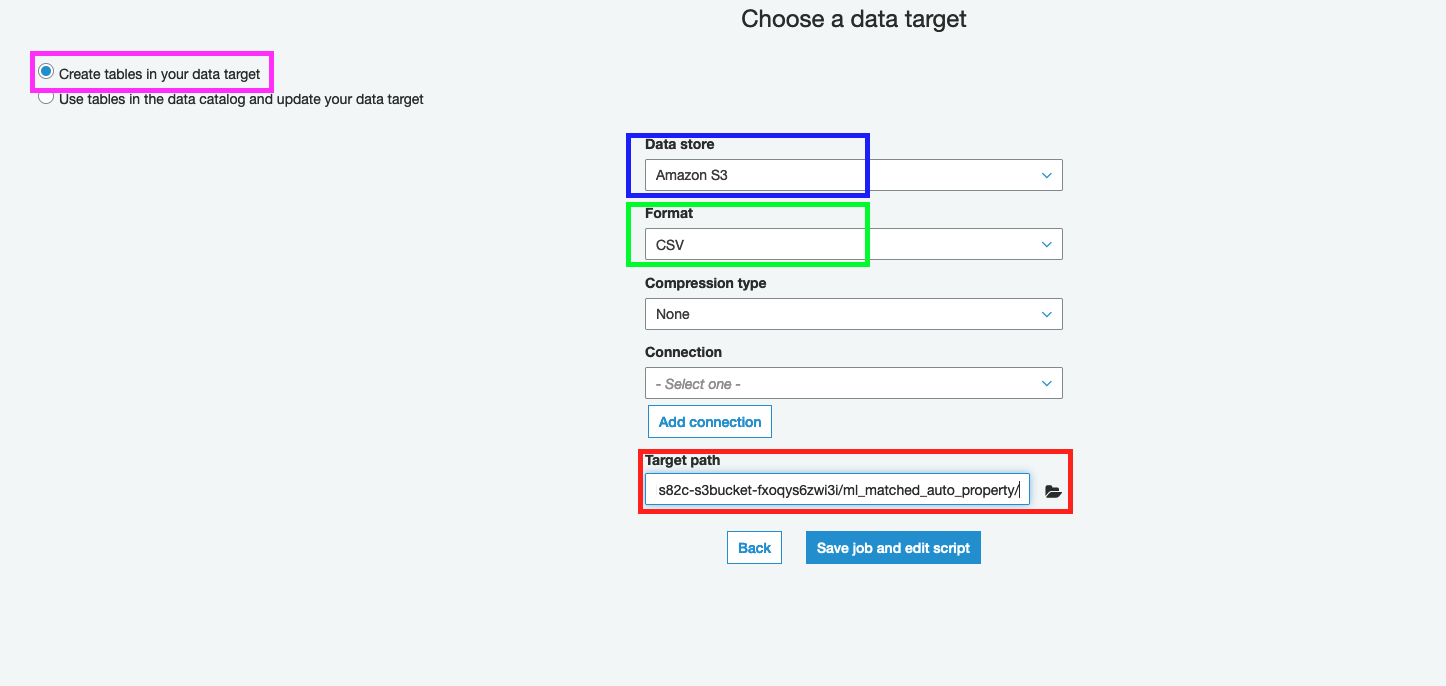
17. Click Save job and edit script
18. Notice that job has auto-generated code invoking FindMatches ML Transform to identify duplicate records
19. Click on Run Job
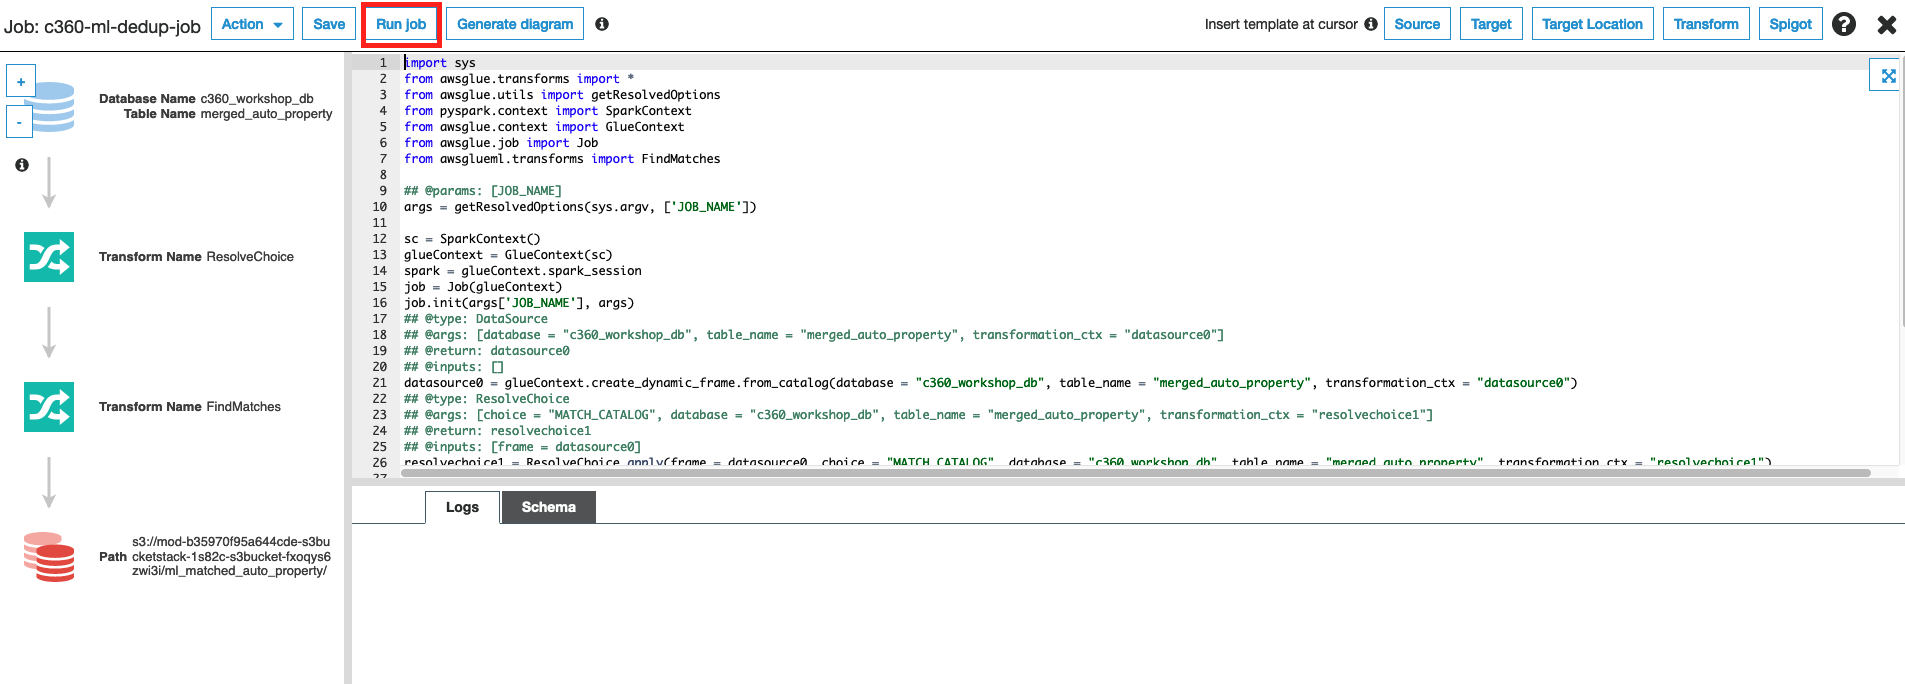
20. Monitor the progress of the job from the Glue console. To go back to Glue console X on top right hand side. This will take you to Glue Console.

Tick the c360-ml-dedup-job. At the bottom you will see the status of the job.
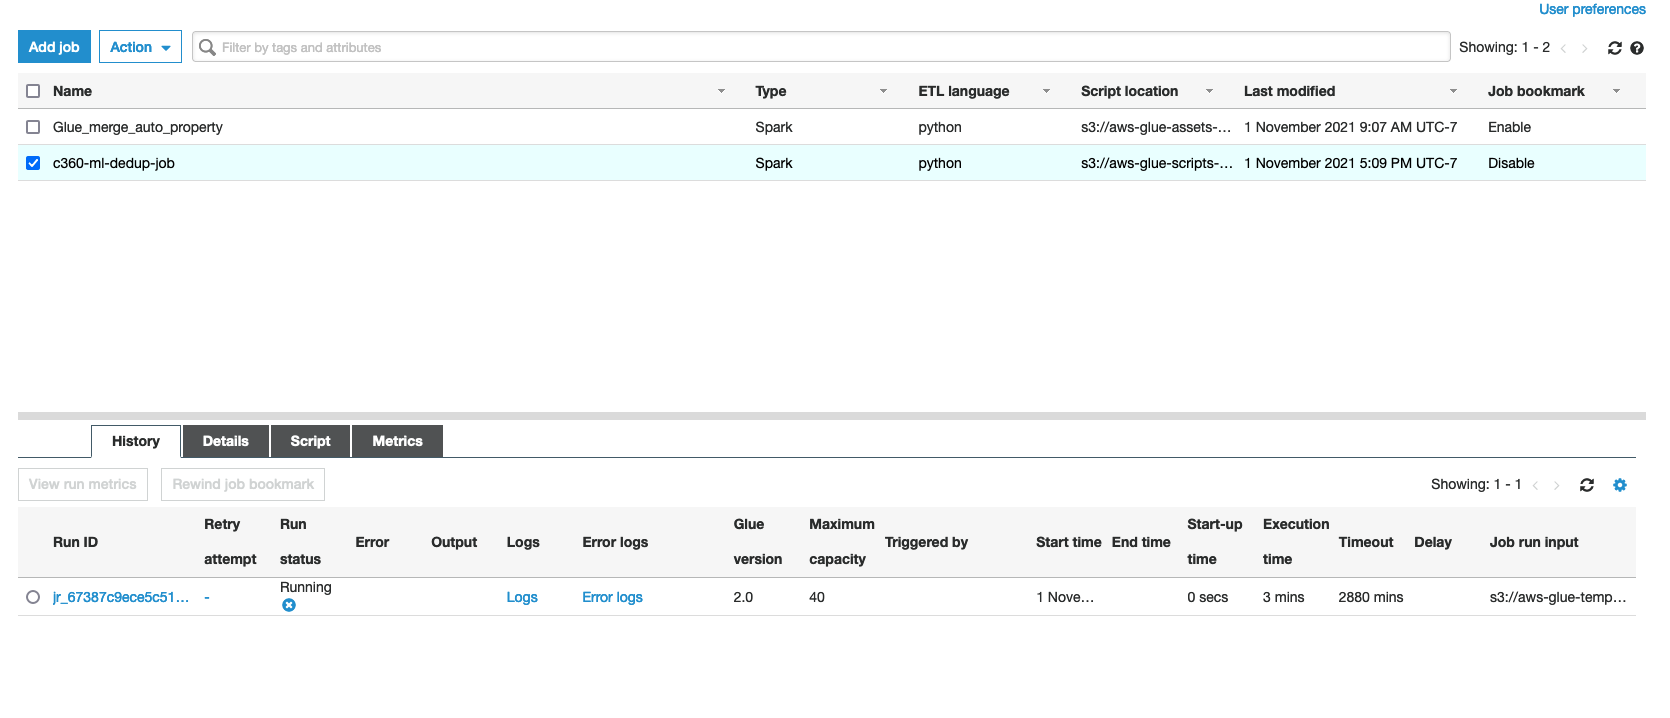
21. Once the Job Status is Succeeded, you can verify the files under ml_matched_auto_property folder in S3 Bucket