Creating Glue Studio Job
Prerequisites : This lab requires Prerequisites and Lab1 to be completed before you can continue. Please continue if you have already completed the prerequisites.
PART A:Create Glue Studio job merging for Auto and Property customer table.
1. Navigate to the AWS Glue Console

2. Under ETL , Click on AWS Glue Studio. Select Jobs 

3. Chose Source as “AWS Glue Data Catalog”
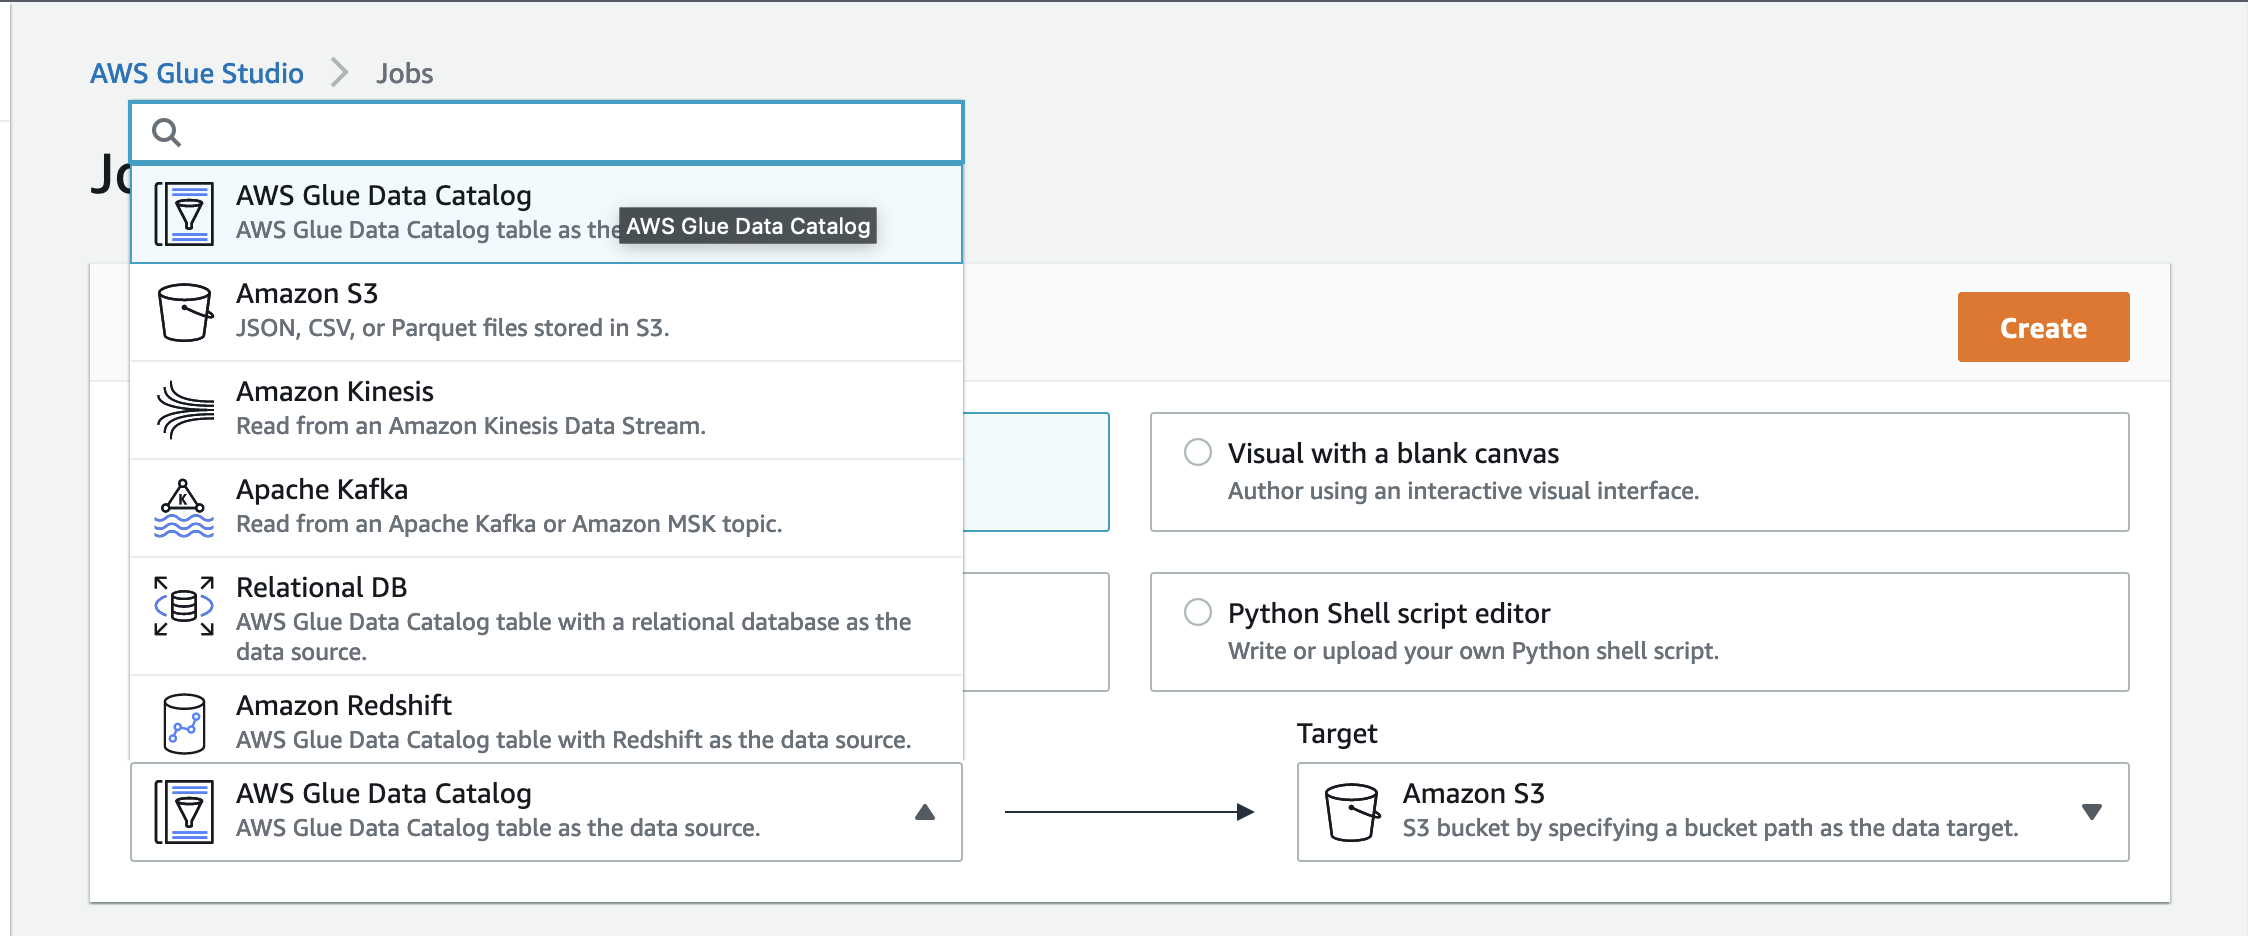
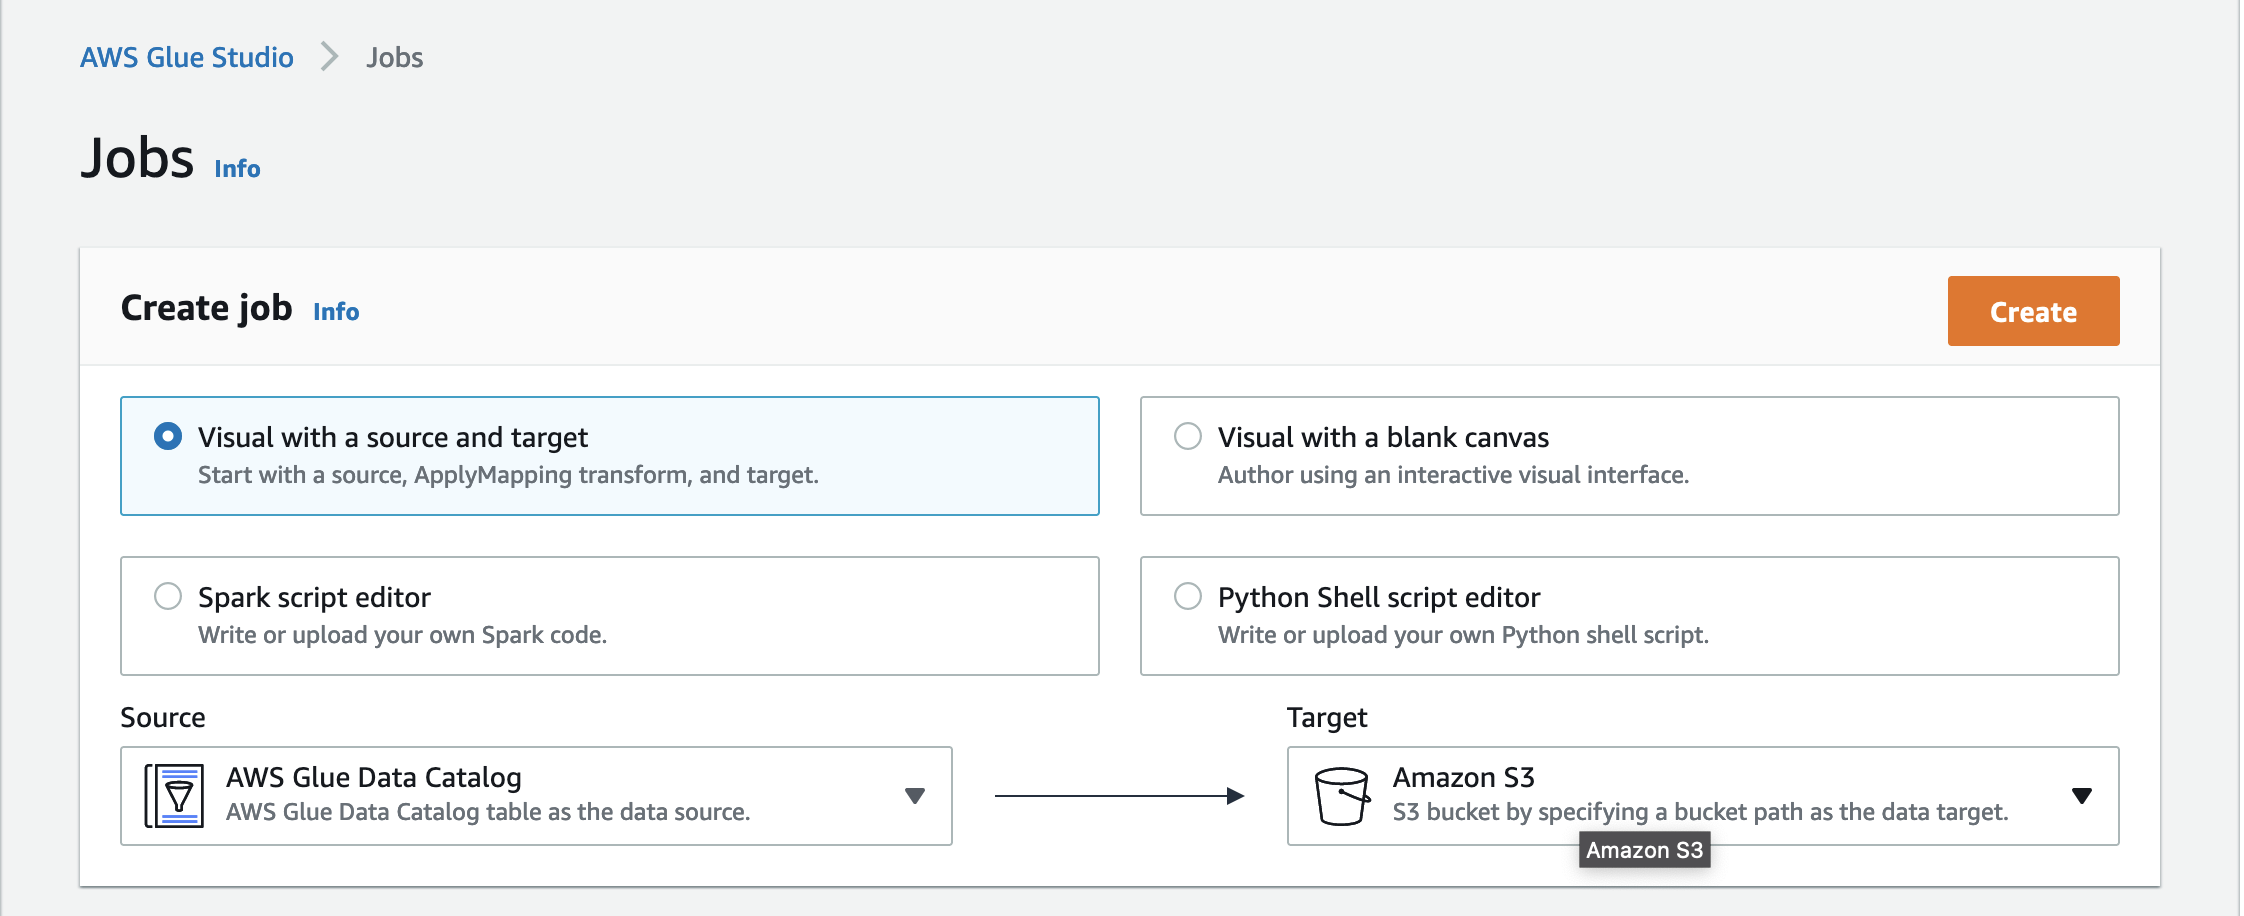
4. Click Create.
5. You will get the Glue workspace as below.
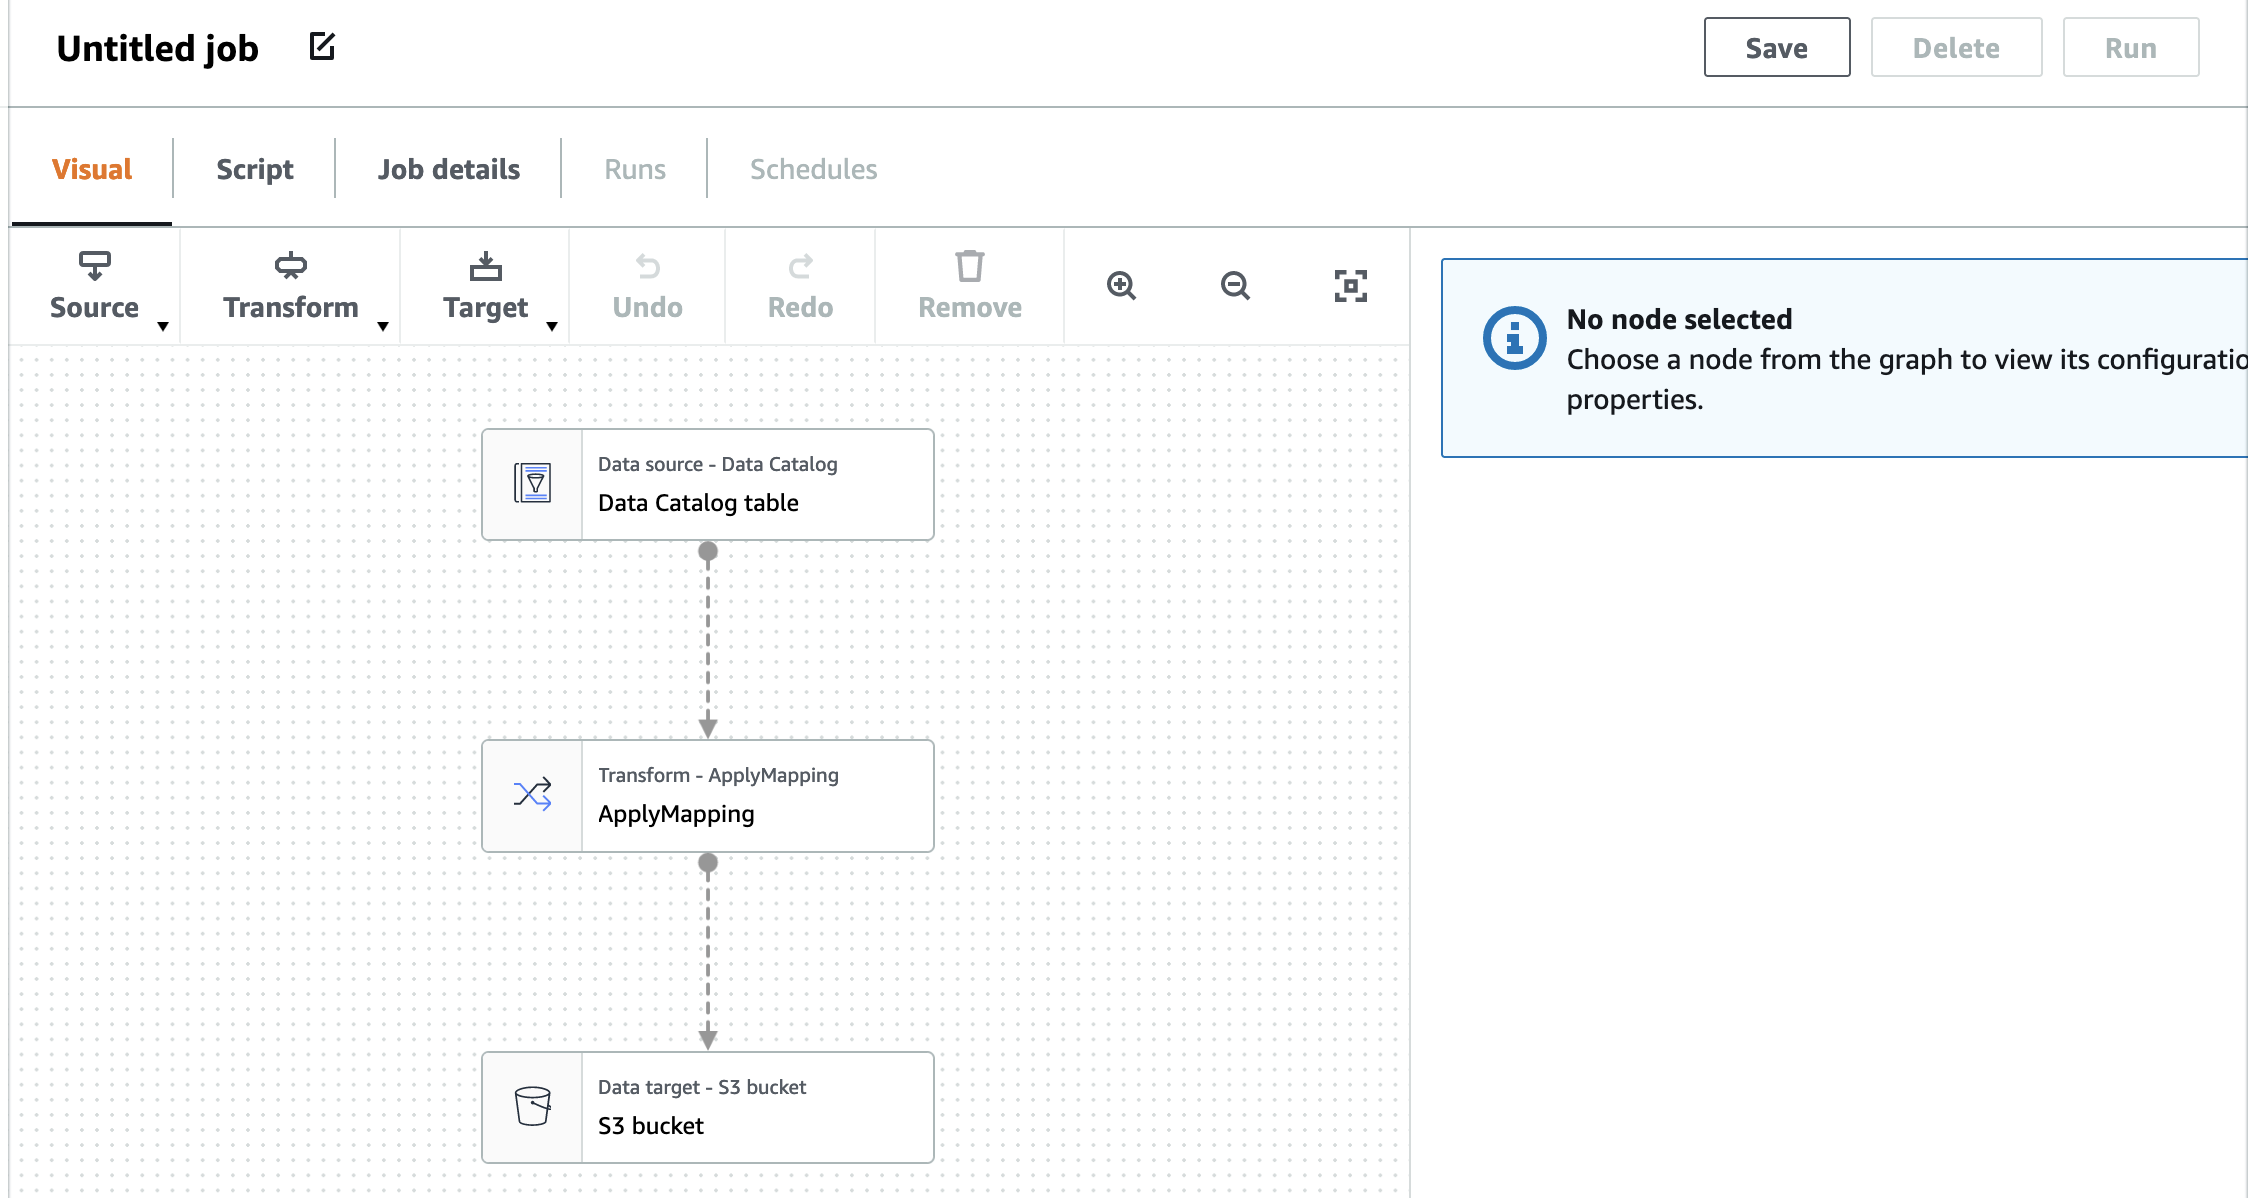
6. Select Node-“Data Source- Data Catalog” - Red shown in picture and click on “Data source properties” shown in Green select Database as “c360_workshop_db” and table as “source_auto_customer”
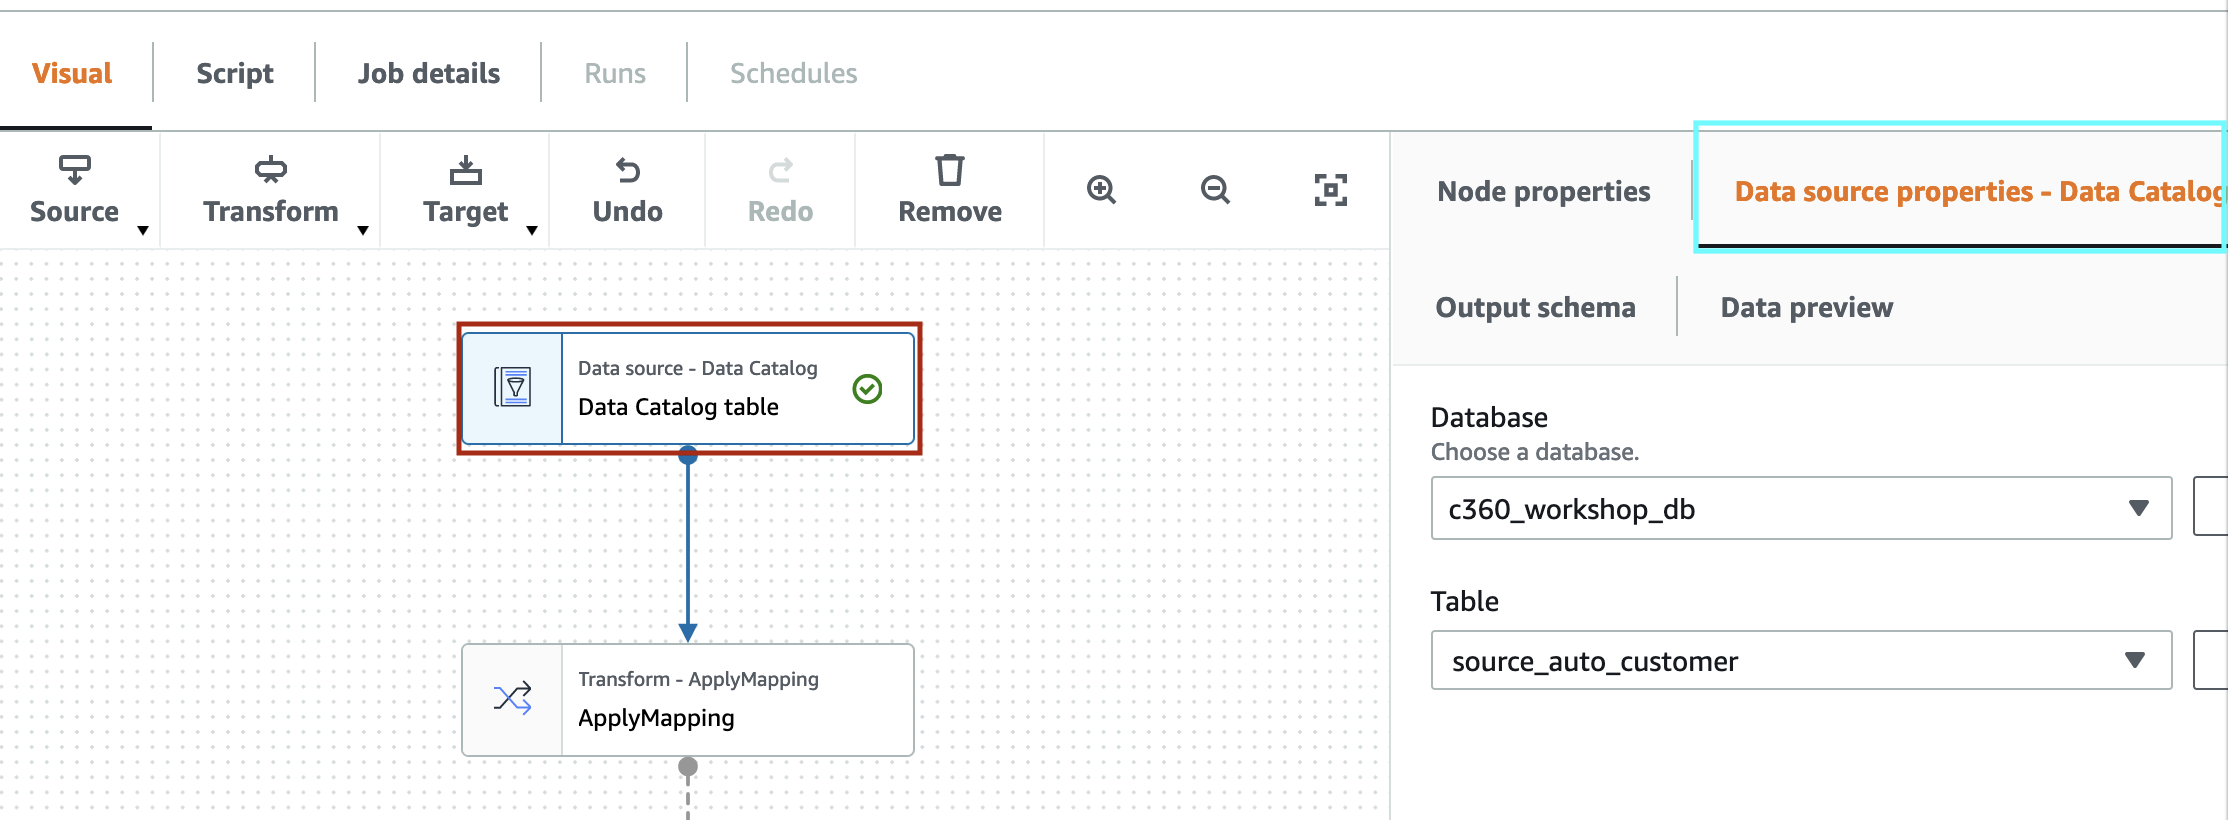
Click “Node Properties”. Change “NAME” to “Source-Auto-DC”
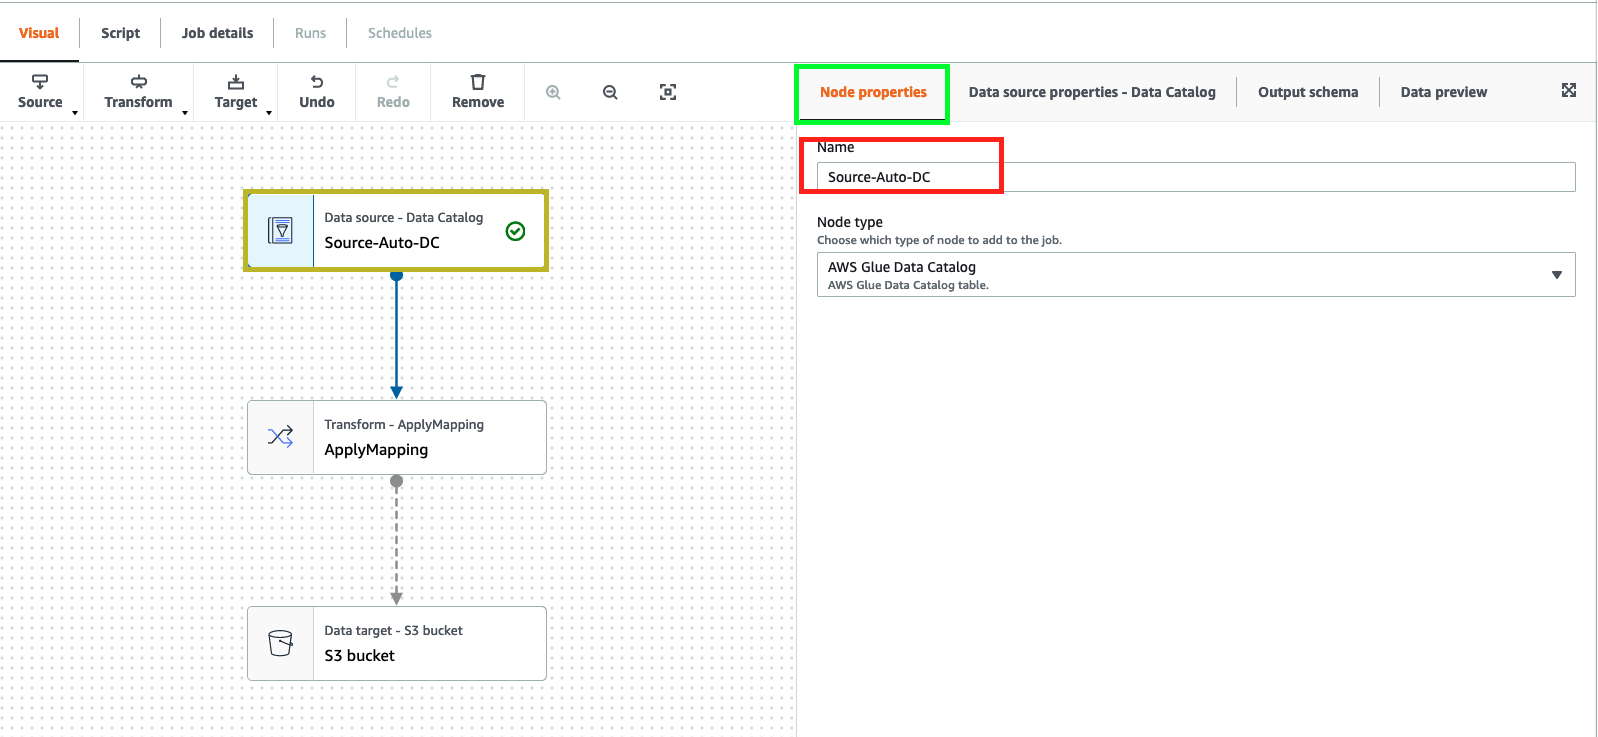
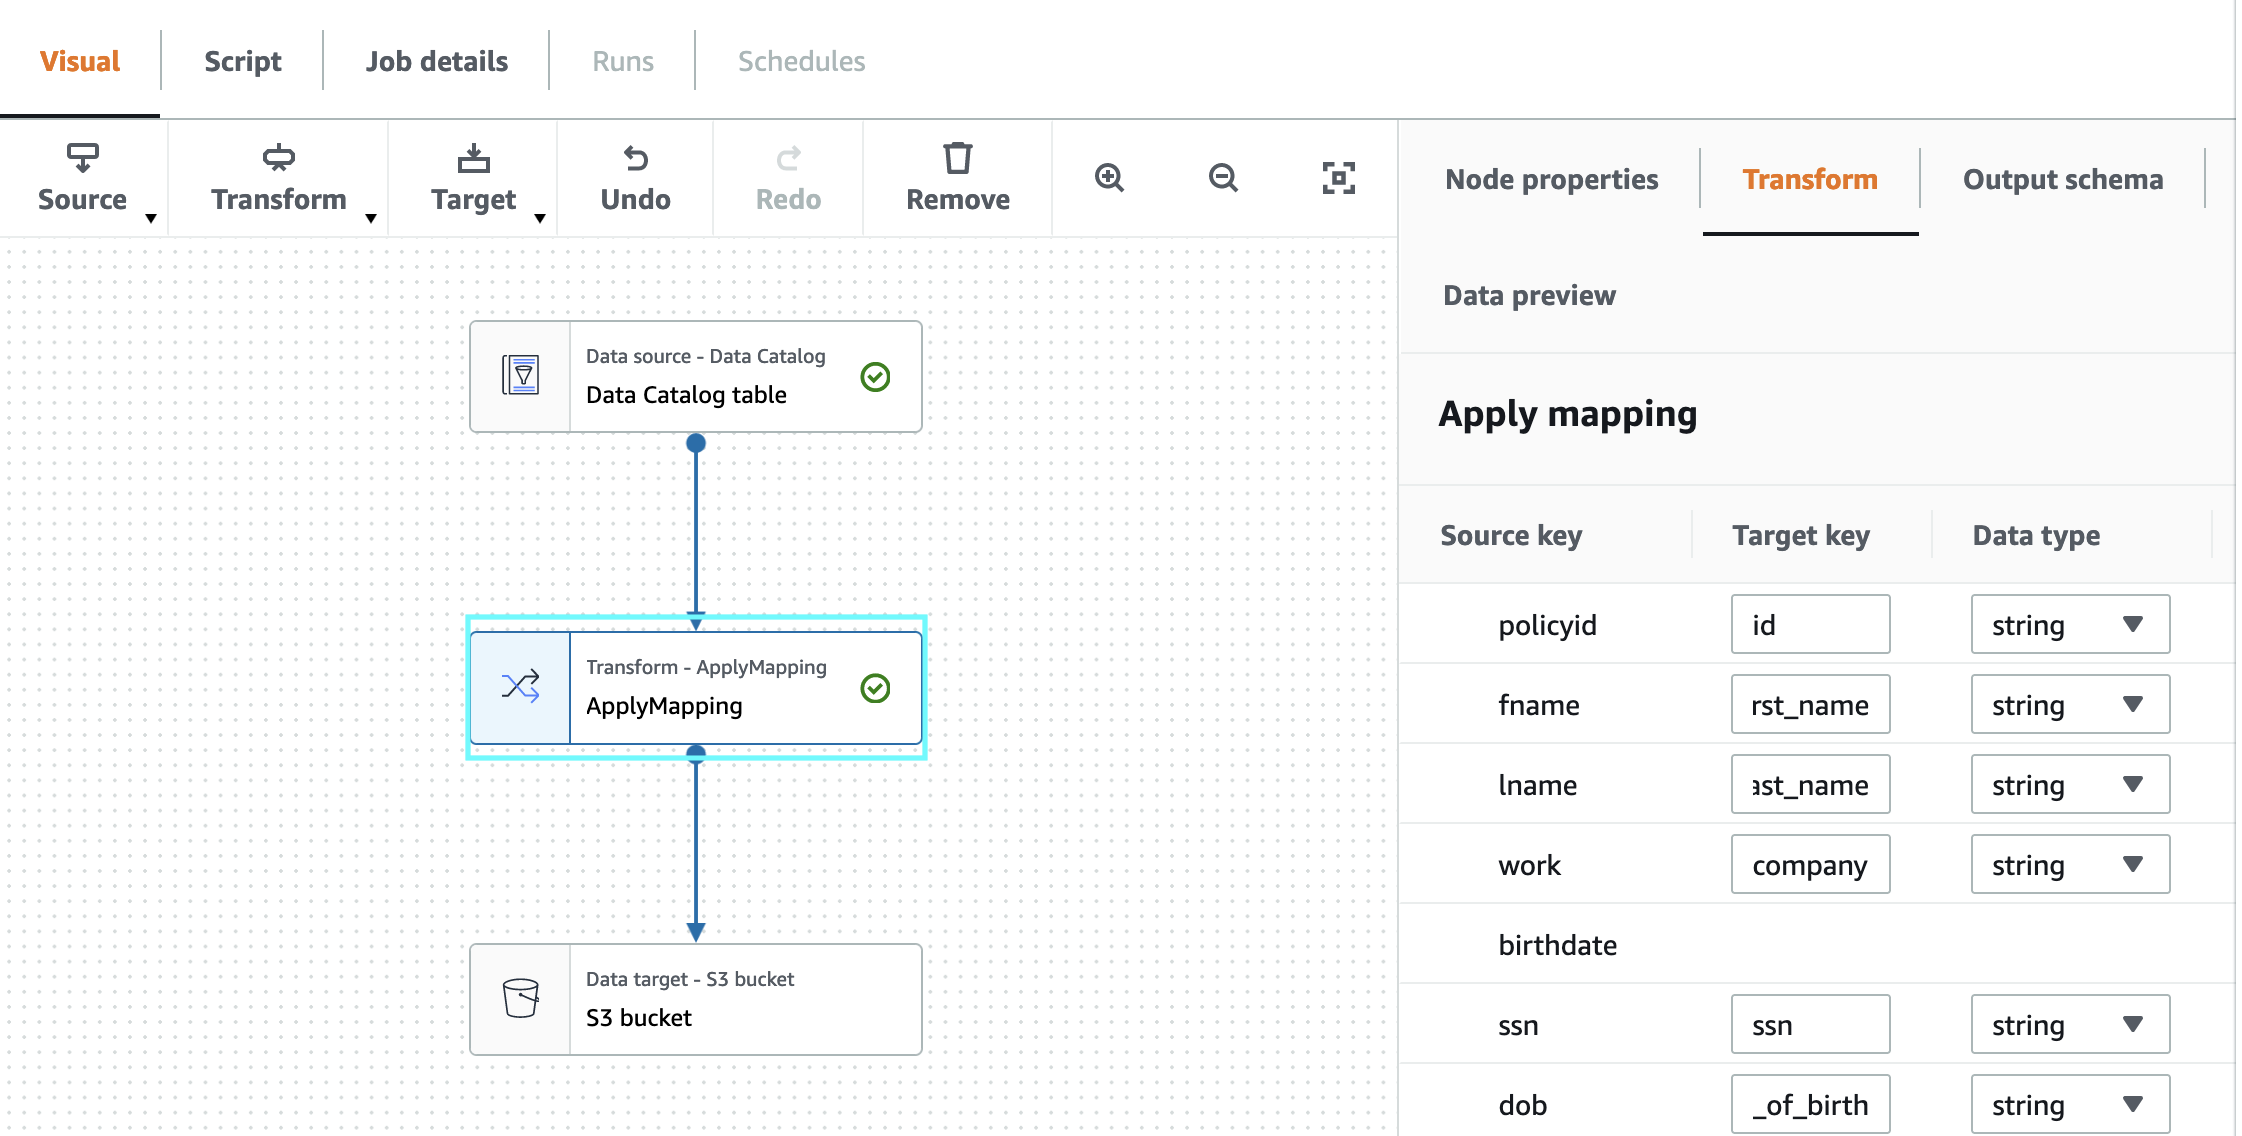
7. Select “Transform-ApplyMapping” node and click on Transform , change below
- Source key “policyid” -> Target key “id” and Data type -> String
- Source key “fname” -> Target key “first_name”
- Source key “lname” -> Target key “last_name”
- Source key “work” -> Target key “company”
- Source key “birthdate” check drop
- Source key “dob” -> Target key “date_of_birth”
- Source key “phone” -> Target key “home_phone”
- Source key “priority” check drop
- Source key “policysince” check drop
- Source key “createddate” check drop
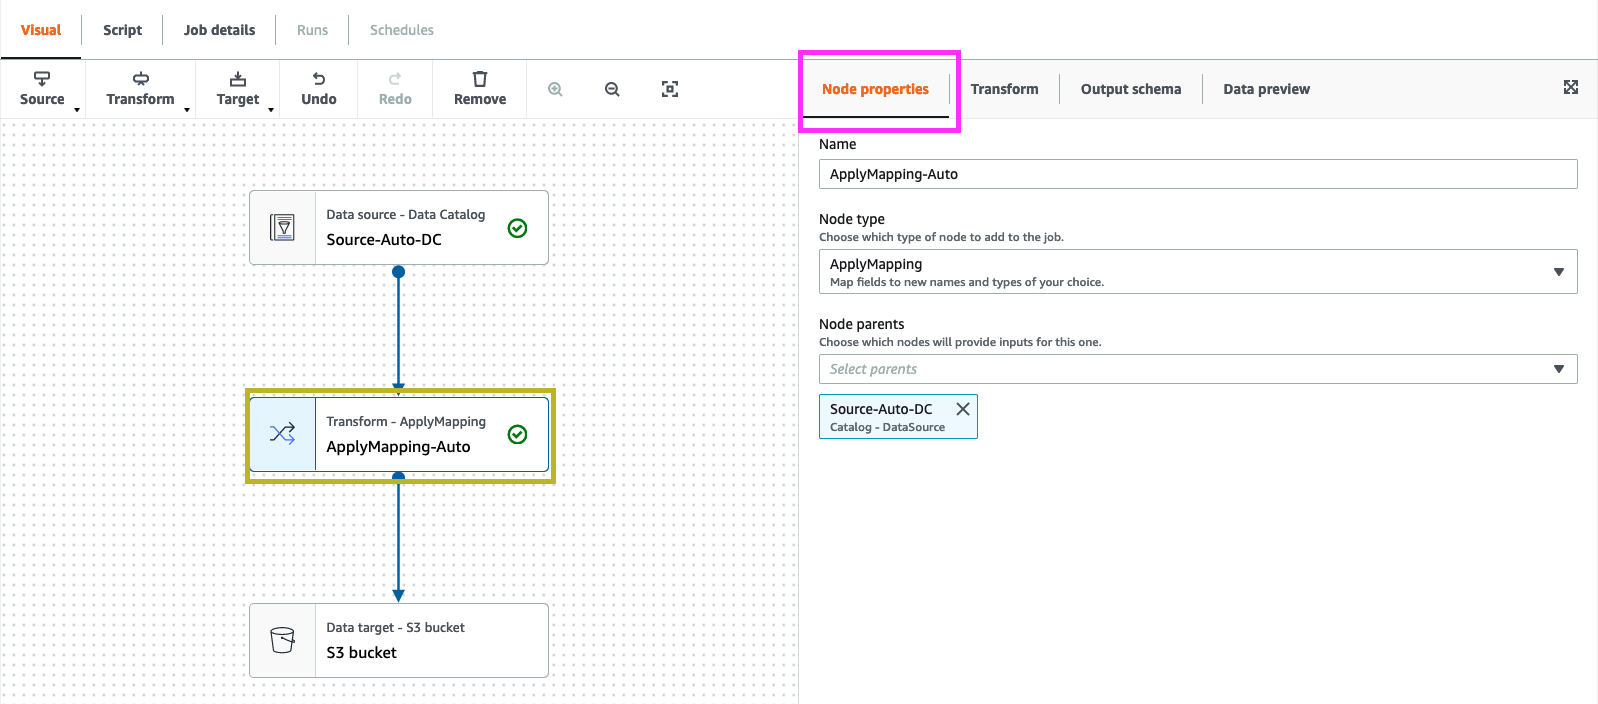
click on “Node Properties”, change the “Name” to “ApplyMapping-Auto”
8. Click on Source and Add another Source Node
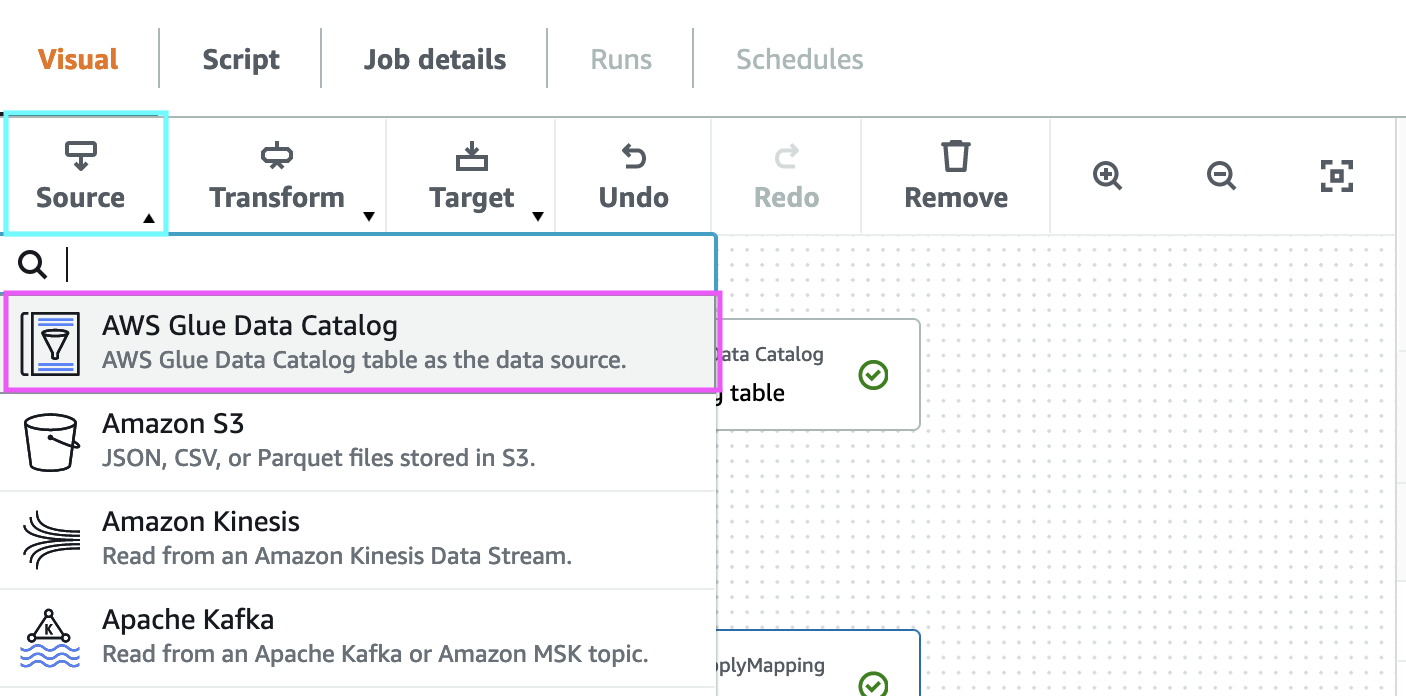
9. select “AWS Glue Data catalog” and “Data source properties”, select Database as “c360_workshop_db” and table as “source_property_customer”

Click “Node Properties”. Change “NAME” to “Source-Property-DC”

10. While selecting “Source-Property-DC”. Click on “Transform” and add ApplyMapping.

11. In “Transform-ApplyMapping” , click “Transform”. Add below chnages
- Source key “customer_id” -> Target key “id” and Data type -> String
- Source key “job” check drop
- Source key “social” -> Target key “ssn”
- Source key “email” check drop
- Source key “industry” check drop
- Source key “city” check drop
- Source key “state” check drop
- Source key “zipcode” check drop
- Source key “netnew” check drop
- Source key “sales_rounded” check drop
- Source key “sales_decimal” check drop
- Source key “priority” check drop
- Source key “industry2” check drop
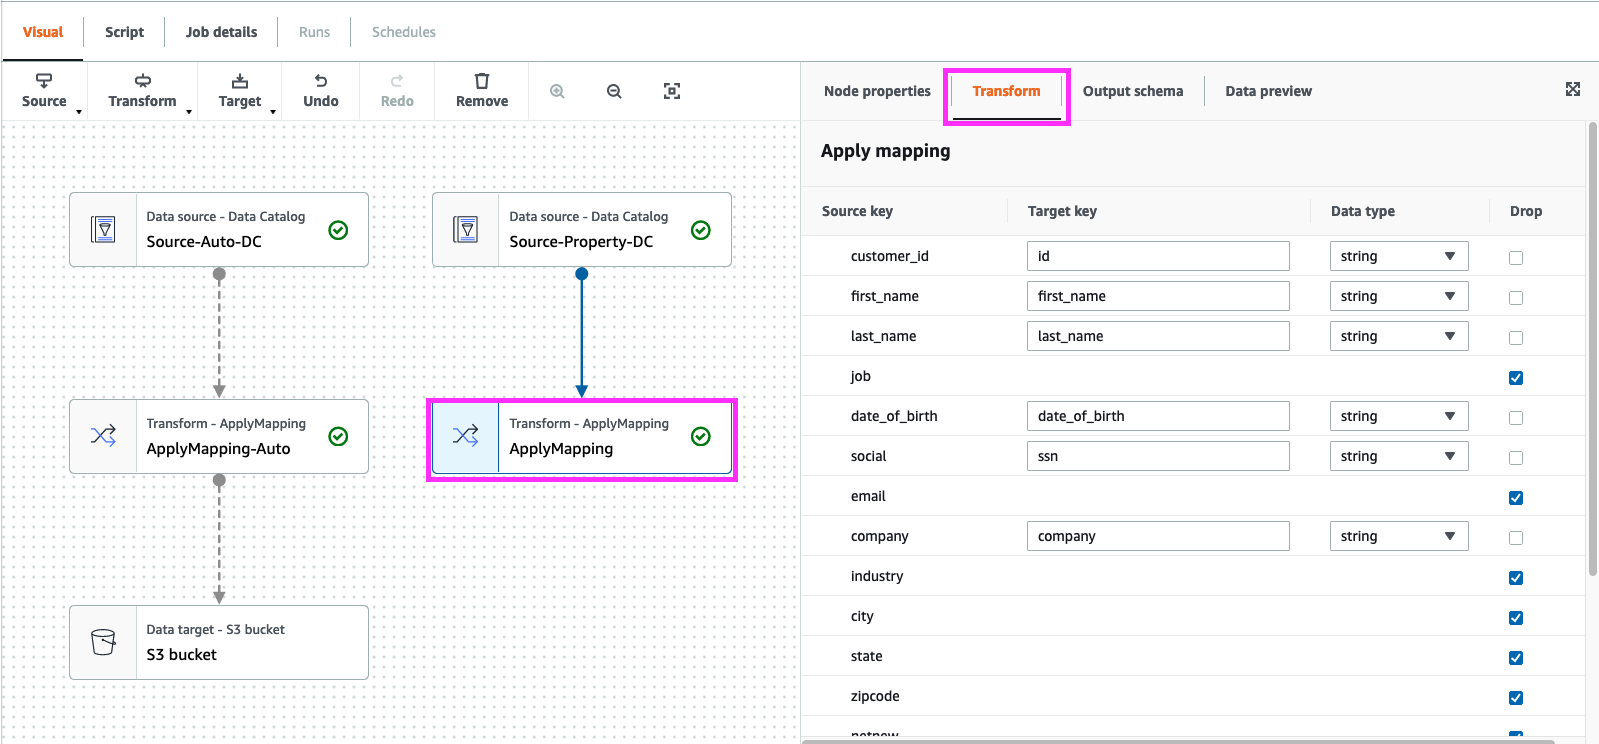
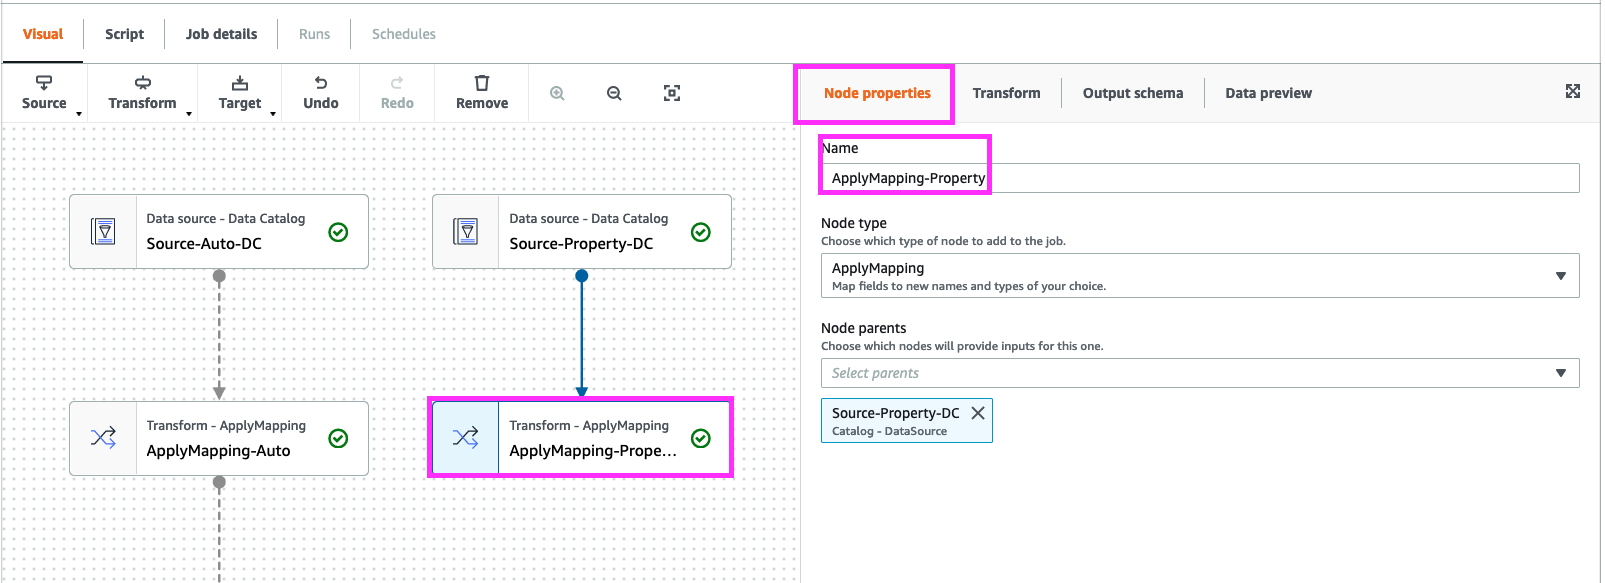
click on “Node Properties”, change the “Name” to “ApplyMapping-Property”
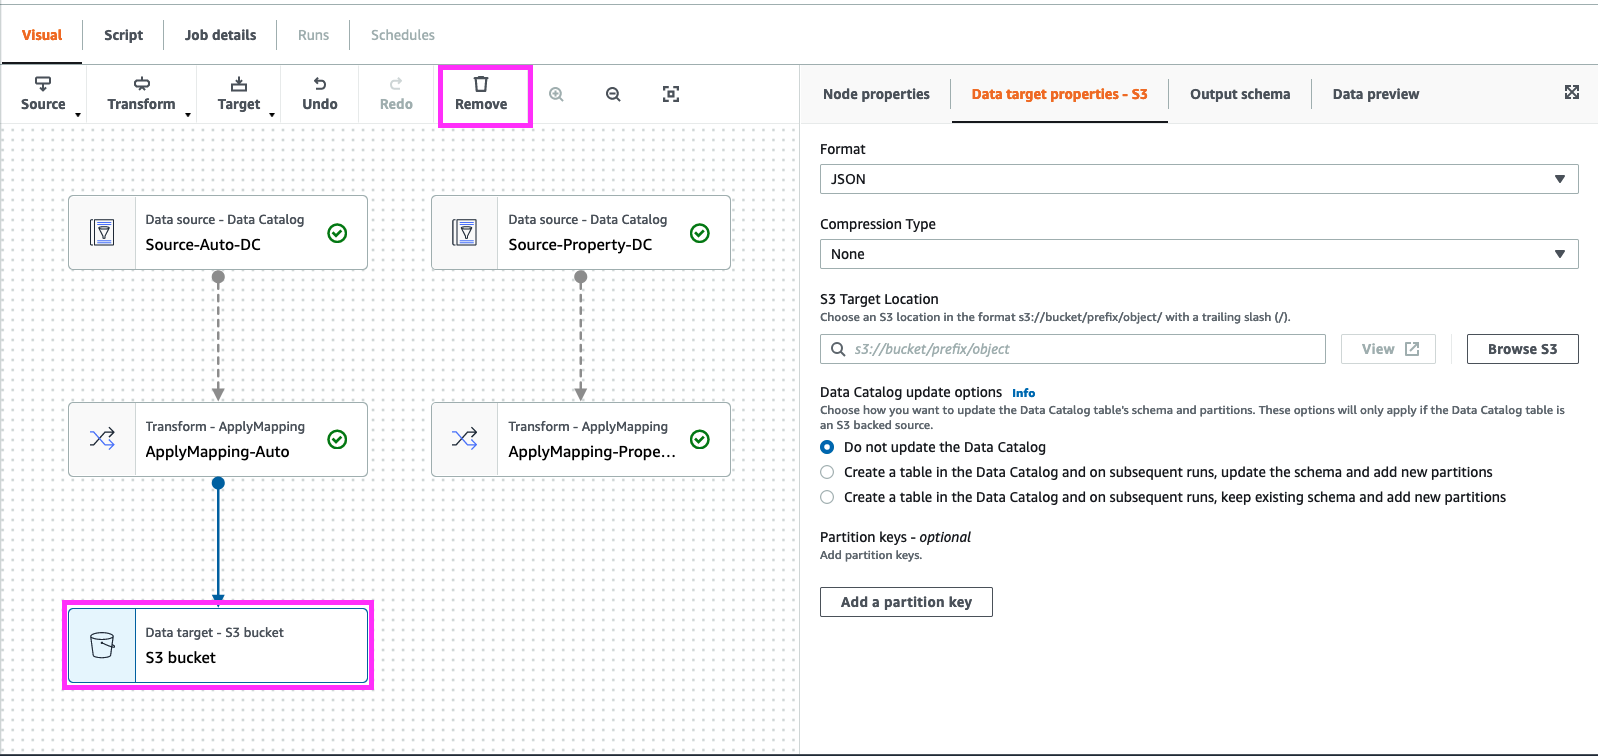
Click “Data Target - S3 Bucket”, click Remove
12. Select “ApplyMapping-Auto” Node and add a “Transform” node of type “SQL”
Note: The “Transform” name changed from “Spark SQL” to “SQL” after the screenshot below was captured.
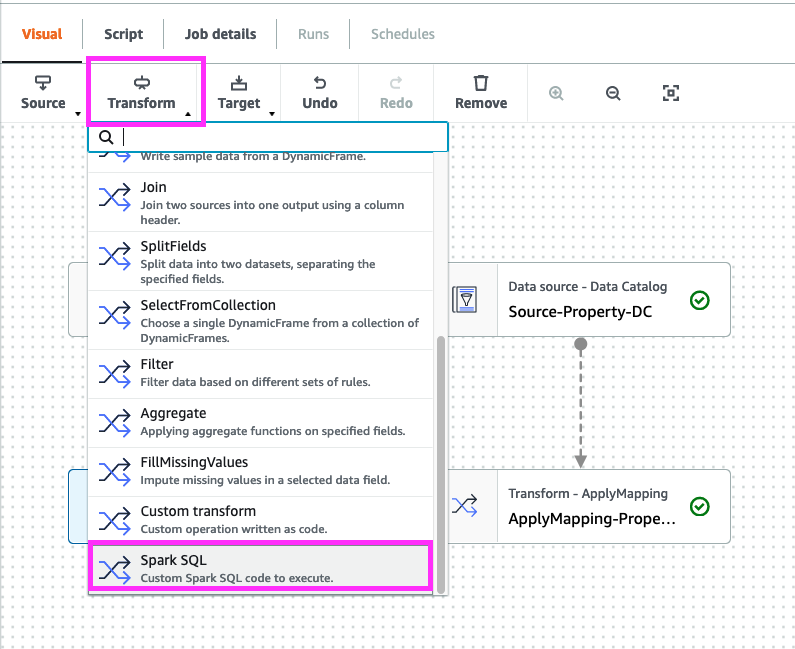
In code block add below
select concat(id,'-auto') as id,first_name,last_name,company,ssn,date_of_birth,home_phone from myDataSource
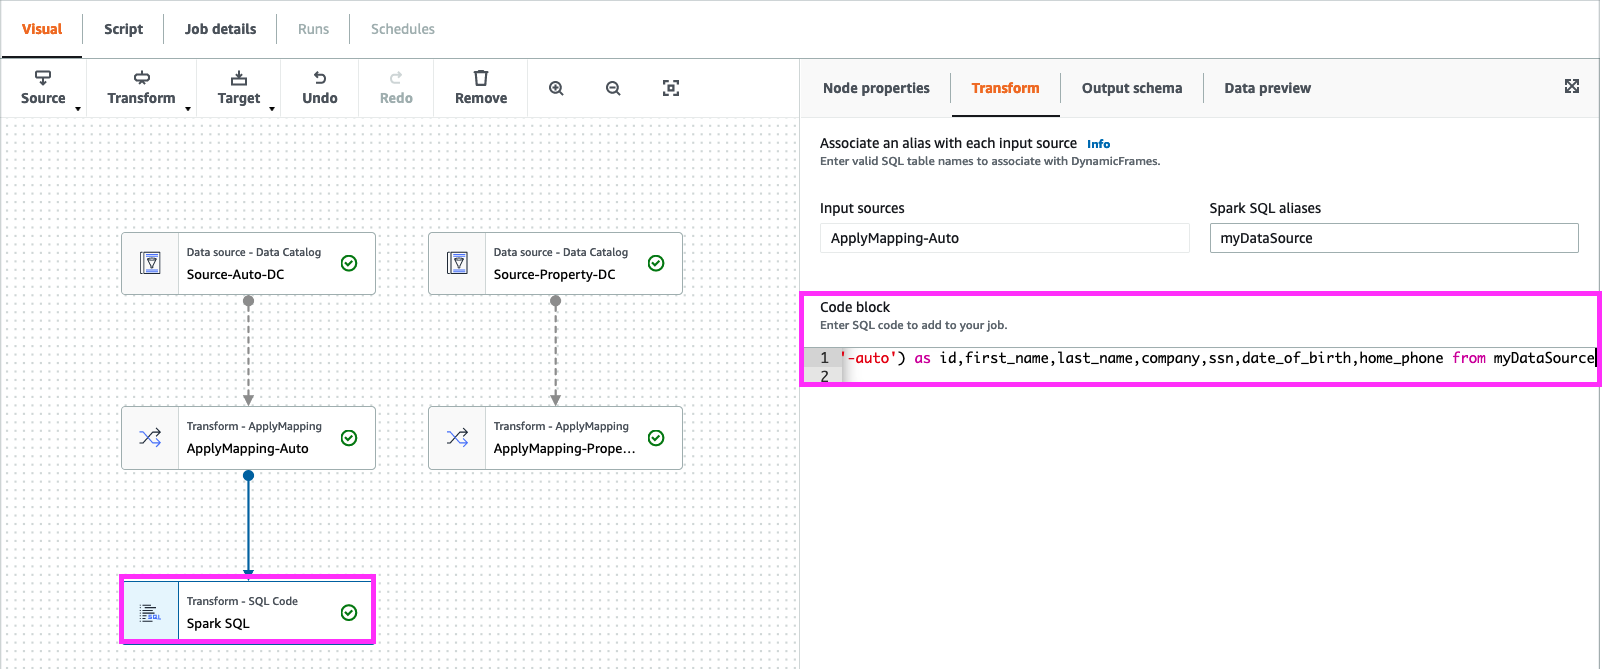
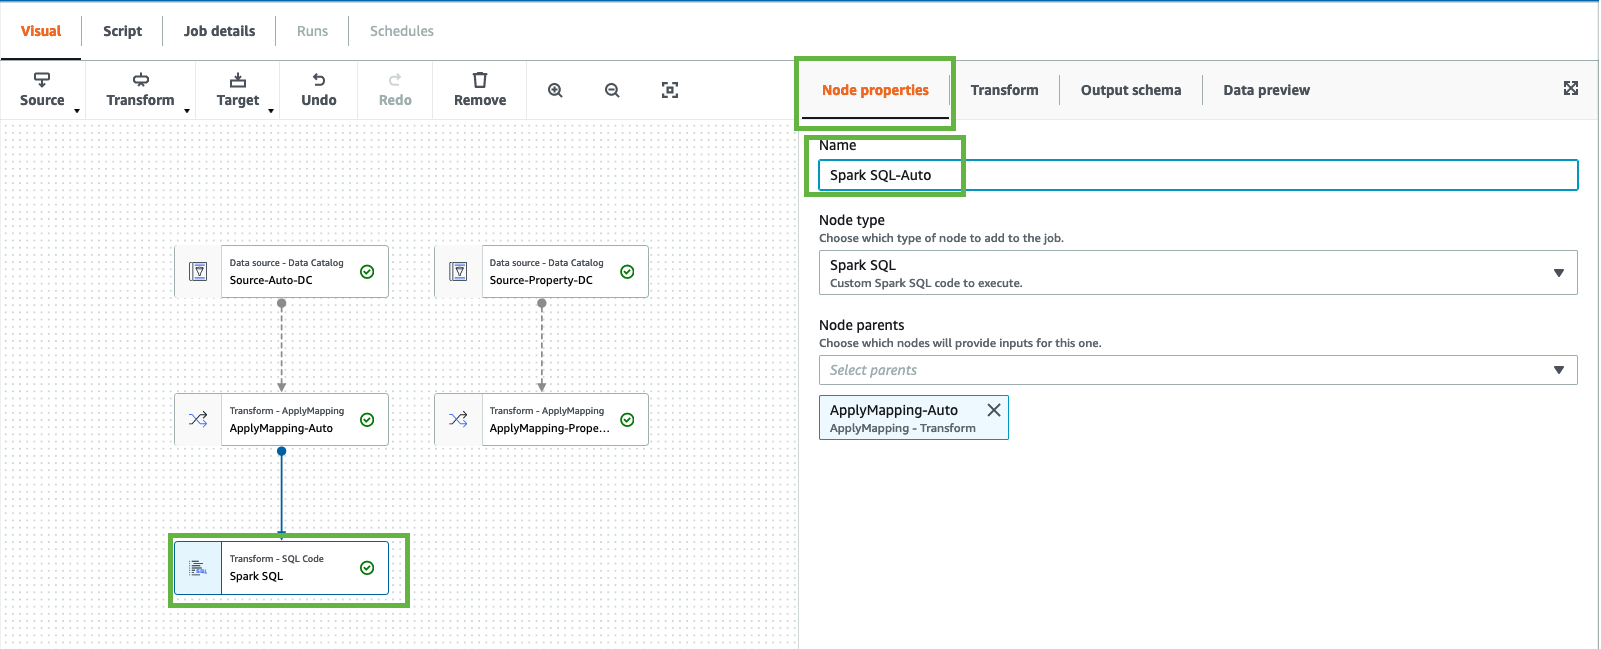
click on “Node Properties”, change the “Name” to “Spark SQL-Auto”
13. Select “ApplyMapping-Property” Node and add “transform” select “Spark SQL”.

In code block add below
select concat(id,'-property') as id,first_name,last_name,company,ssn,date_of_birth,home_phone from myDataSource
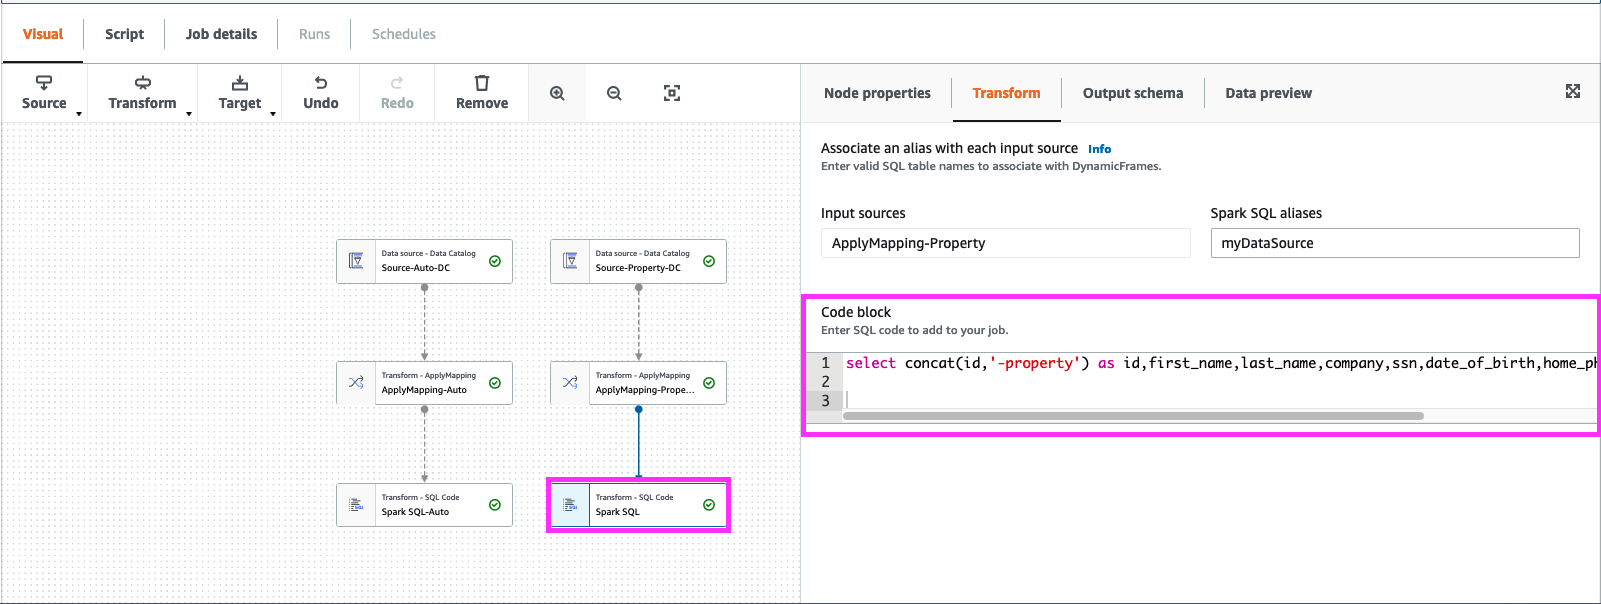
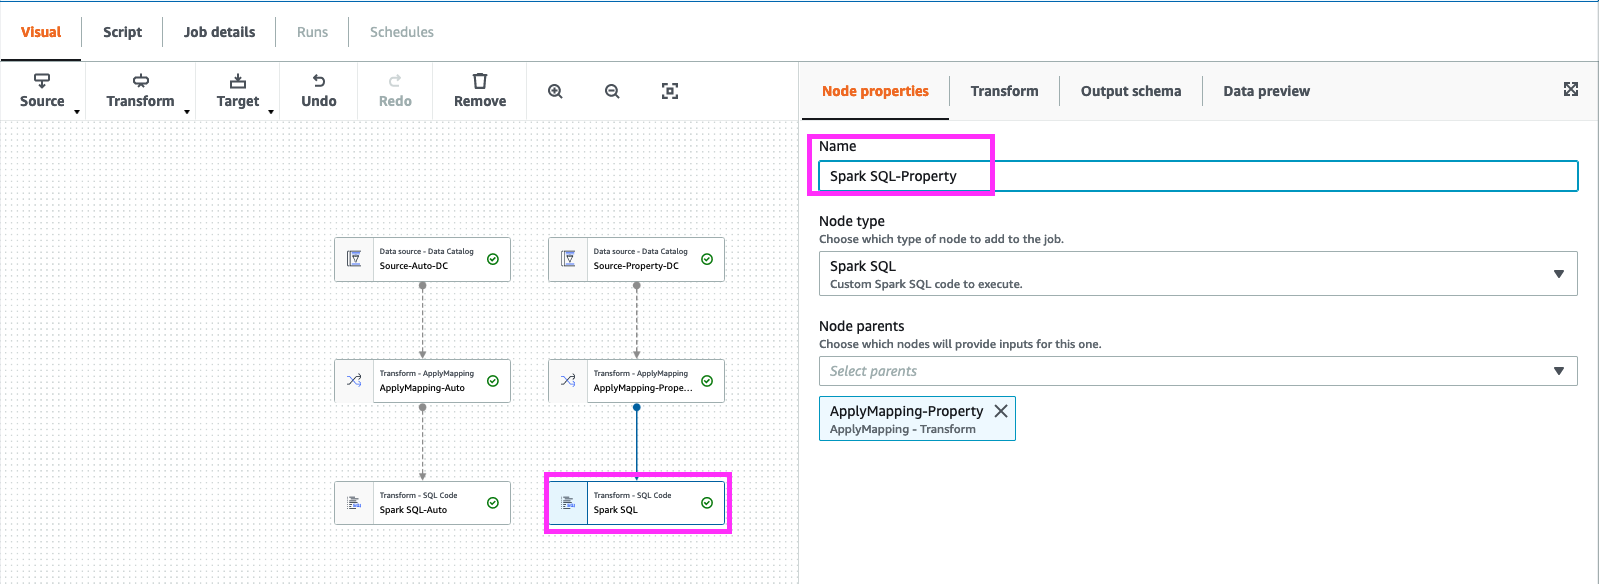
click on “Node Properties”, change the “Name” to “Spark SQL-Property”
14. Select “Spark SQL-Property” node and add “transform” select “Spark SQL”.

on “Spark SQL” click on “Node Properties” goto “Node parents” check “Spark SQL-Auto” and “Spark SQL-Property”
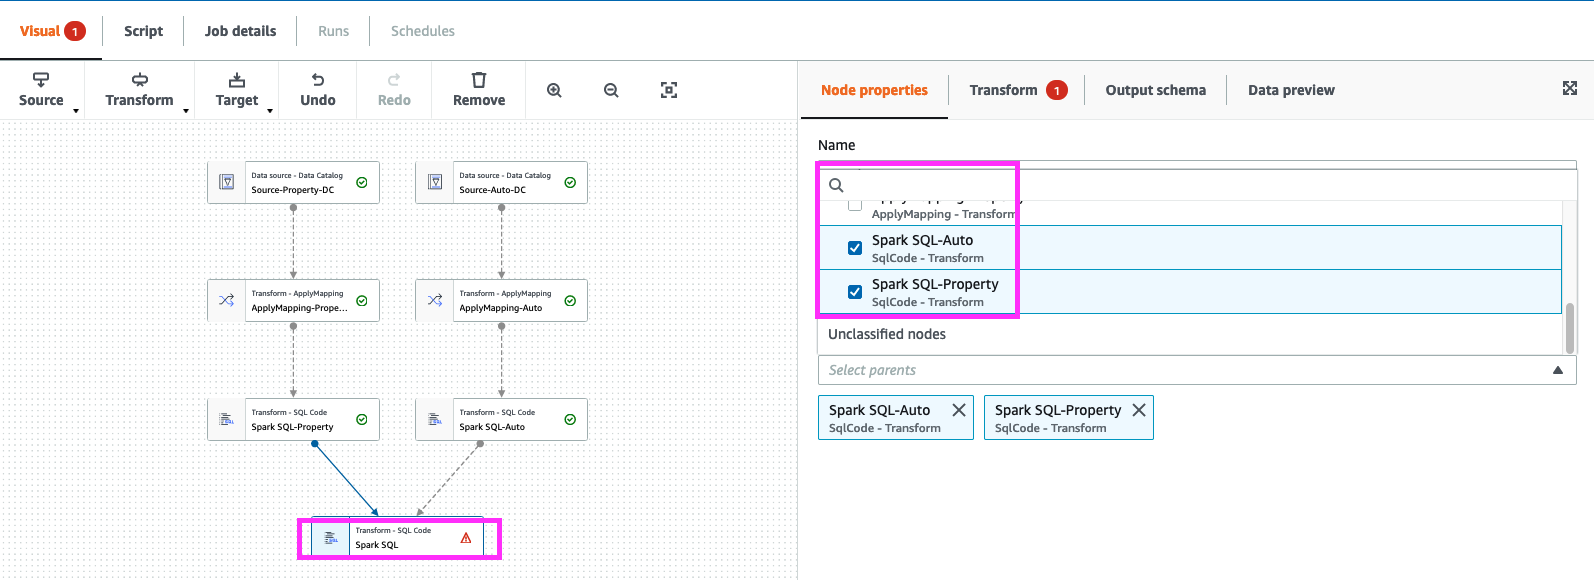
Next Click on “Transform”,
- In Input sources of “Spark SQL-property” -> Spark SQL aliases to “myDataSourceProperty”.
- In Input sources of “Spark SQL-Auto” -> Spark SQL aliases to “myDataSourceAuto”.
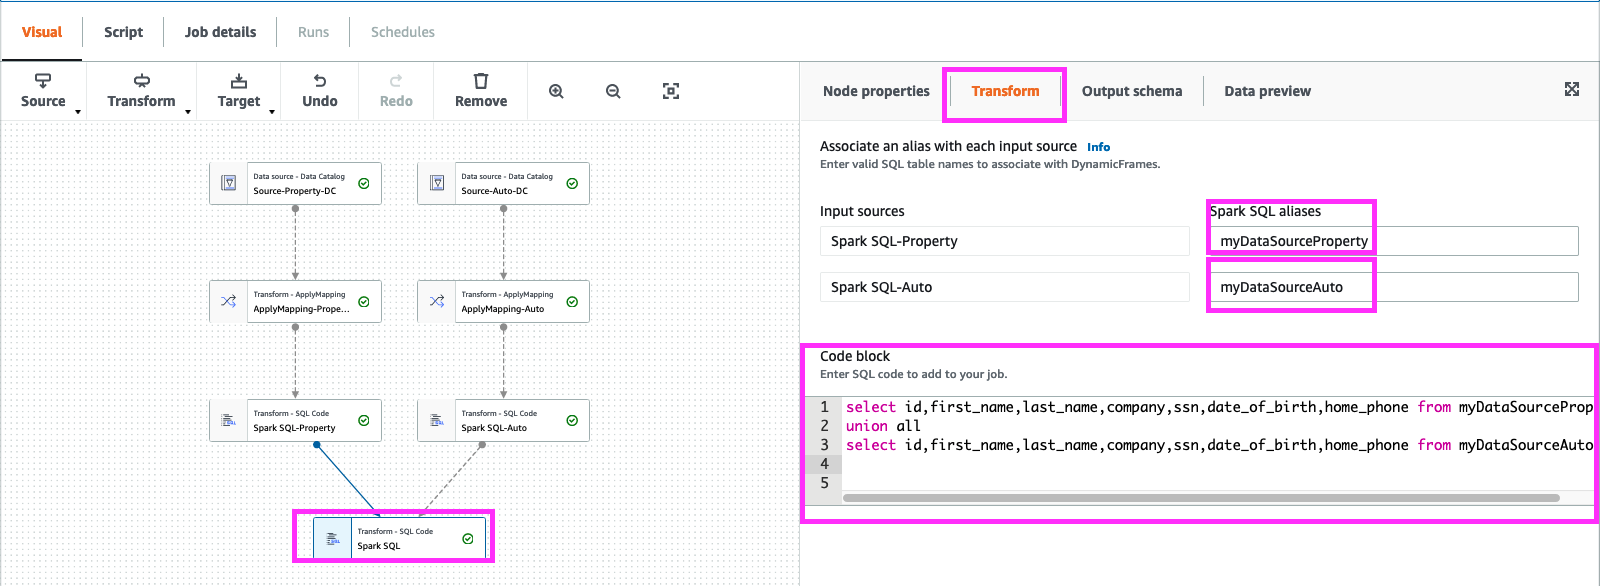
next in Code block paste the below query
select id,first_name,last_name,company,ssn,date_of_birth,home_phone from myDataSourceProperty
union all
select id,first_name,last_name,company,ssn,date_of_birth,home_phone from myDataSourceAuto
16. Select last “Spark SQL” node and click “Target” Node as Amazon S3.
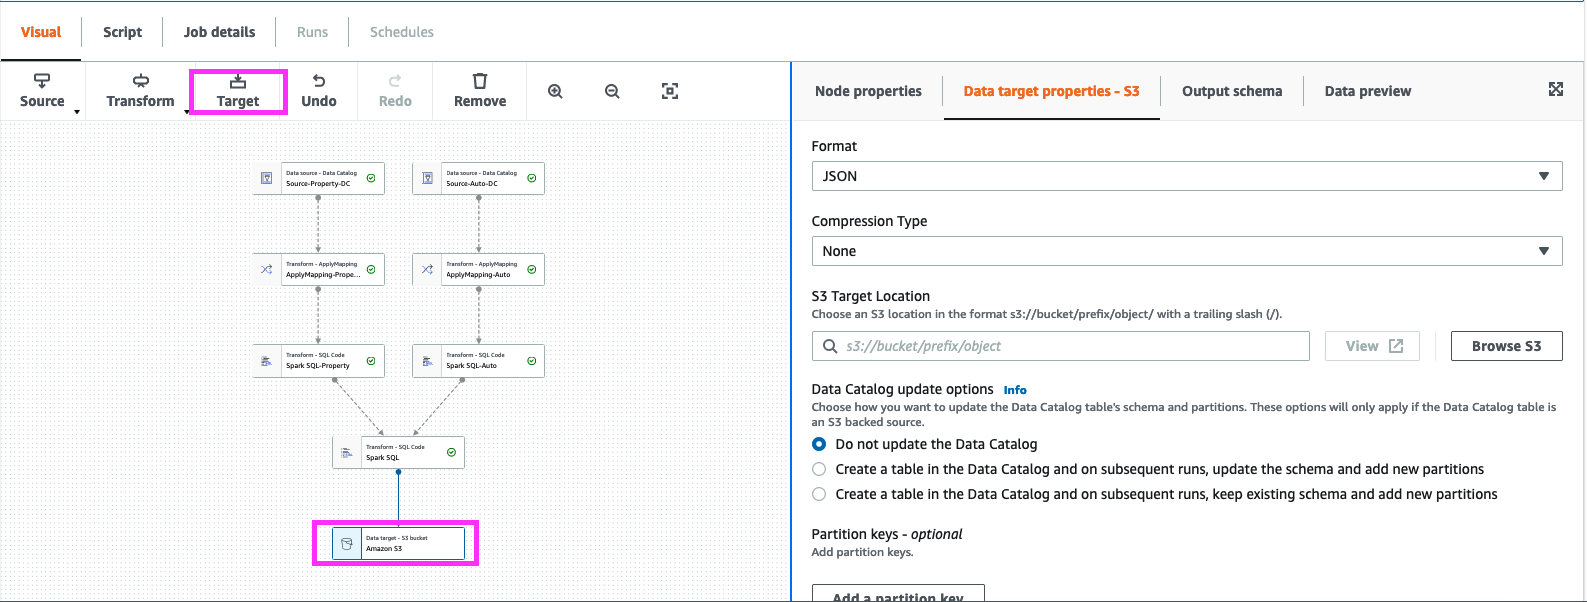
in “Data Target Properties” select format as “parquet”, “Compression Type” as snappy “S3 Target Location” -> mod-xxxx-s3bucketstack-xxxx-s3bucket-xxxx Chose.
Append “merged_auto_property” to “S3 Target Location” example :-
- s3://mod-xxxx-s3bucketstack-xxxx-s3bucket-xxxx/merged_auto_property/
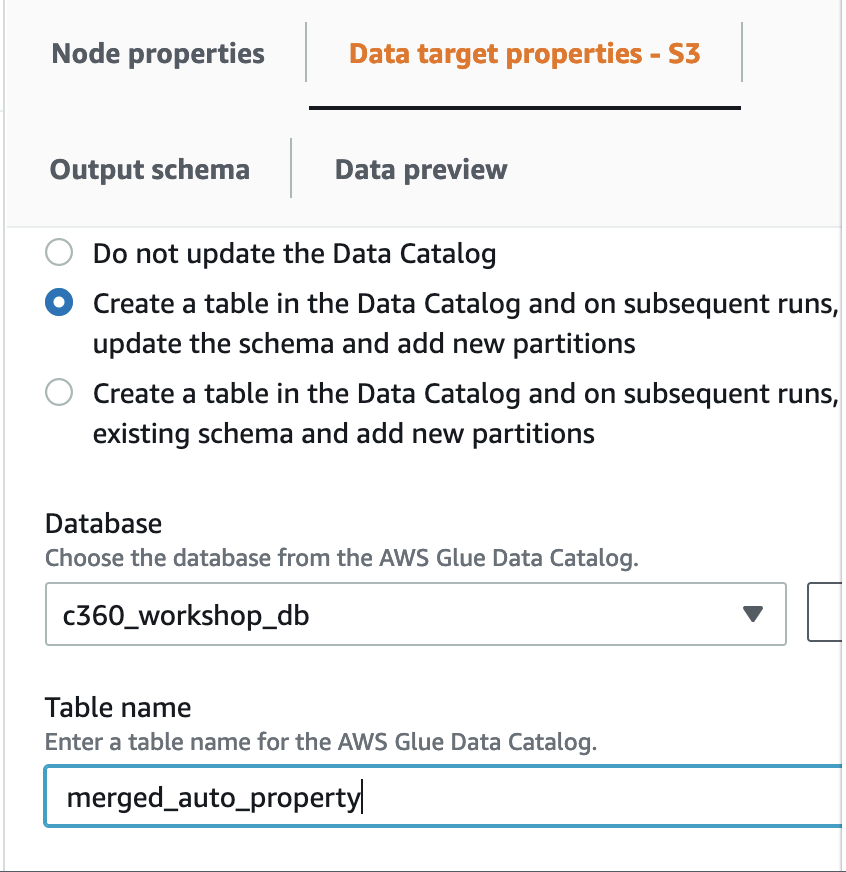
In “Data Catalog update options” select
- “Create a table in the Data Catalog and on subsequent runs, update the schema and add new partitions”
For Database -> c360_workshop_db , Table -> “merged_auto_property”
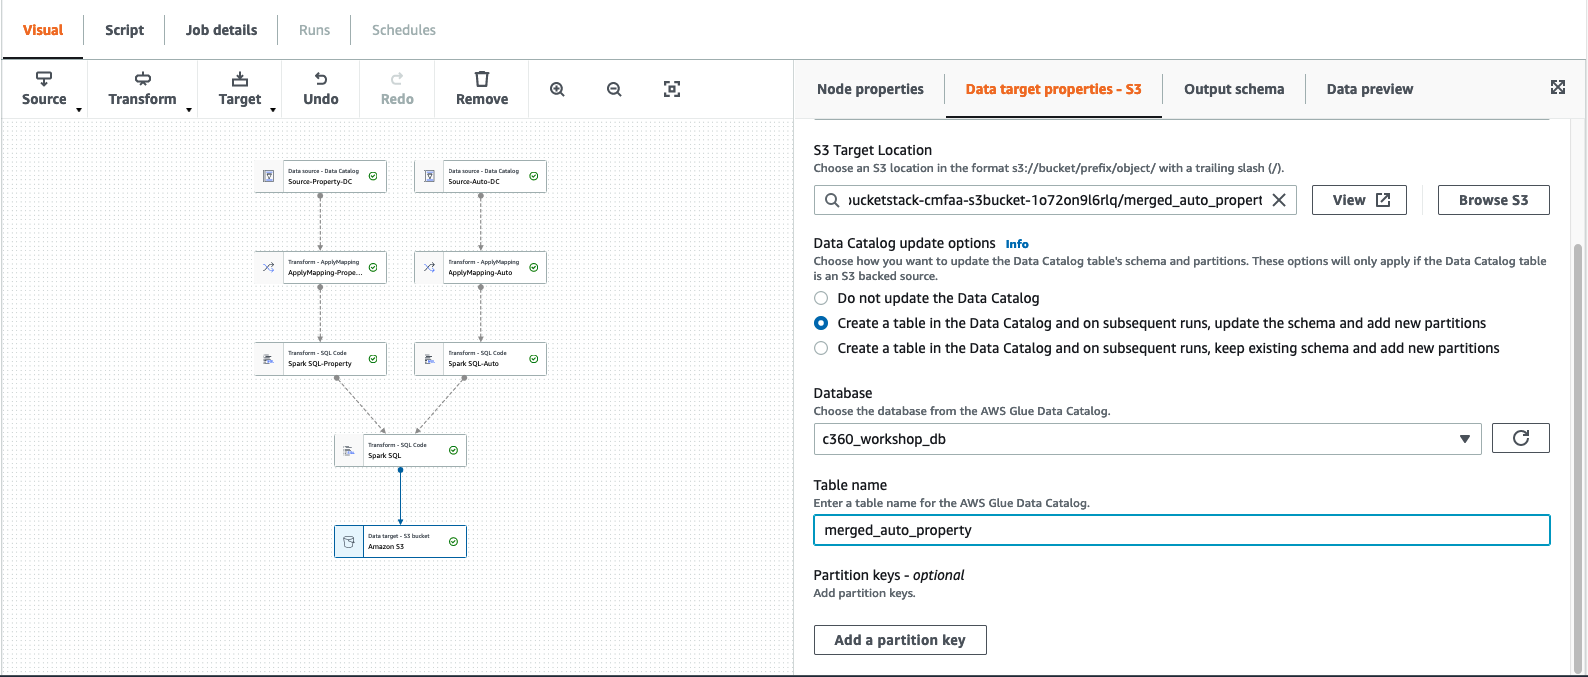
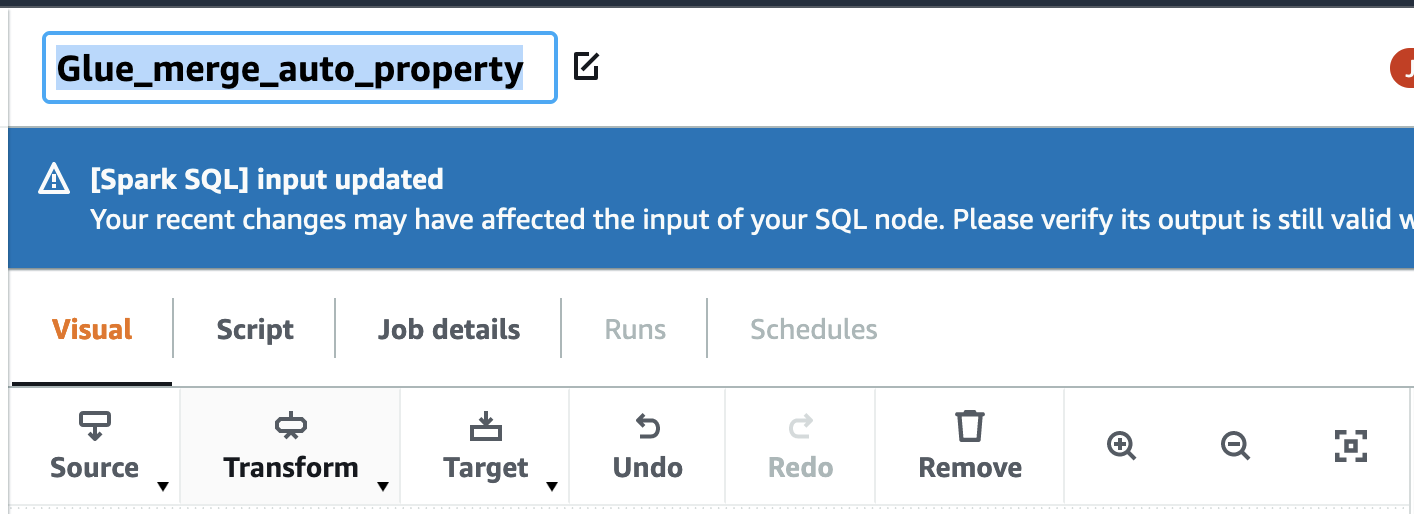
17. Add the job name as Glue_merge_auto_property
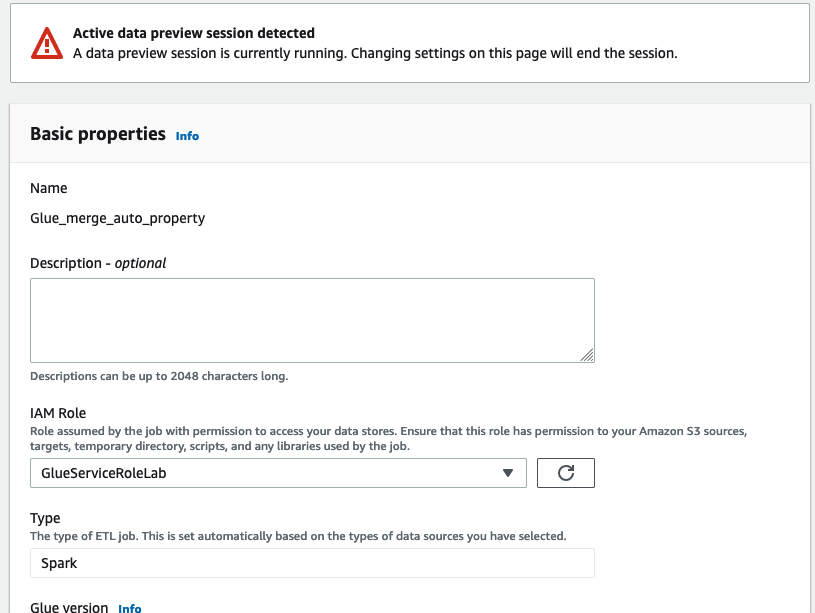
18. Click on Job details . Chose the IAM role as “GlueServiceRoleLab” and click save.
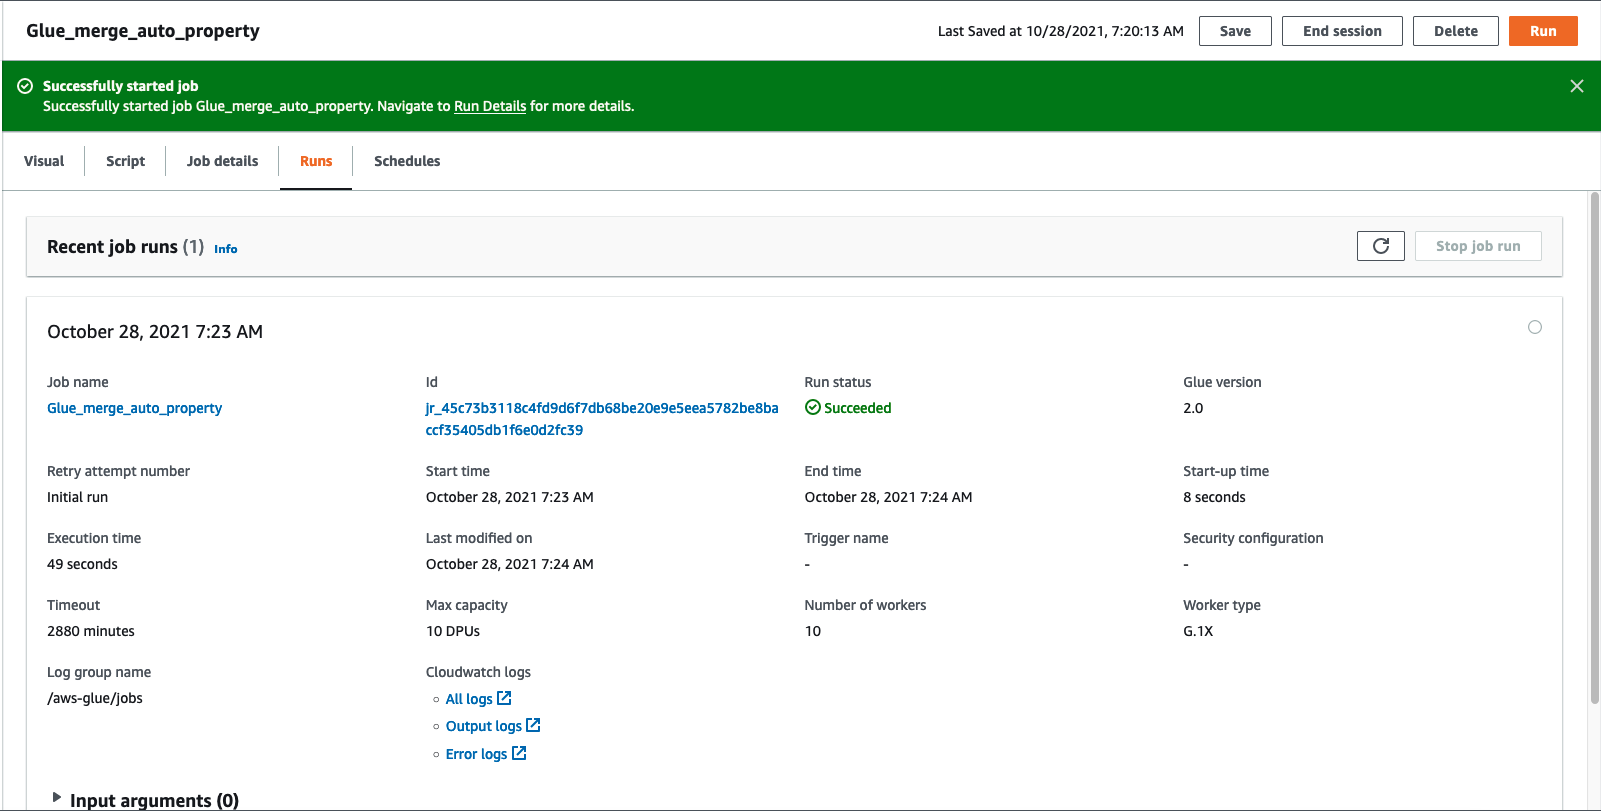
19. Click Run job on the top.
20. Click on the “Runs” tab for job execution status and wait for job “Run status” to change to Succeeded
21. Verify going back to AWS Glue Console
 Click on Tables

22. You can also verify “merged_auto_property” in Athena and “preview the table”
Now you can Goto Lab 3b Glue ML Transformation